Printing your own shell
This page will guide you through using the STL files to print your own PS Placeable shells. There are a few key things to keep in mind so please read the whole guide through!
I use a bambu labs PS1 and X1C I am not sponsored by them, and just like other attempts I was laugh at through email when I asked them to sponsor this project. So Please buy any printer you want and use any slicer you want.
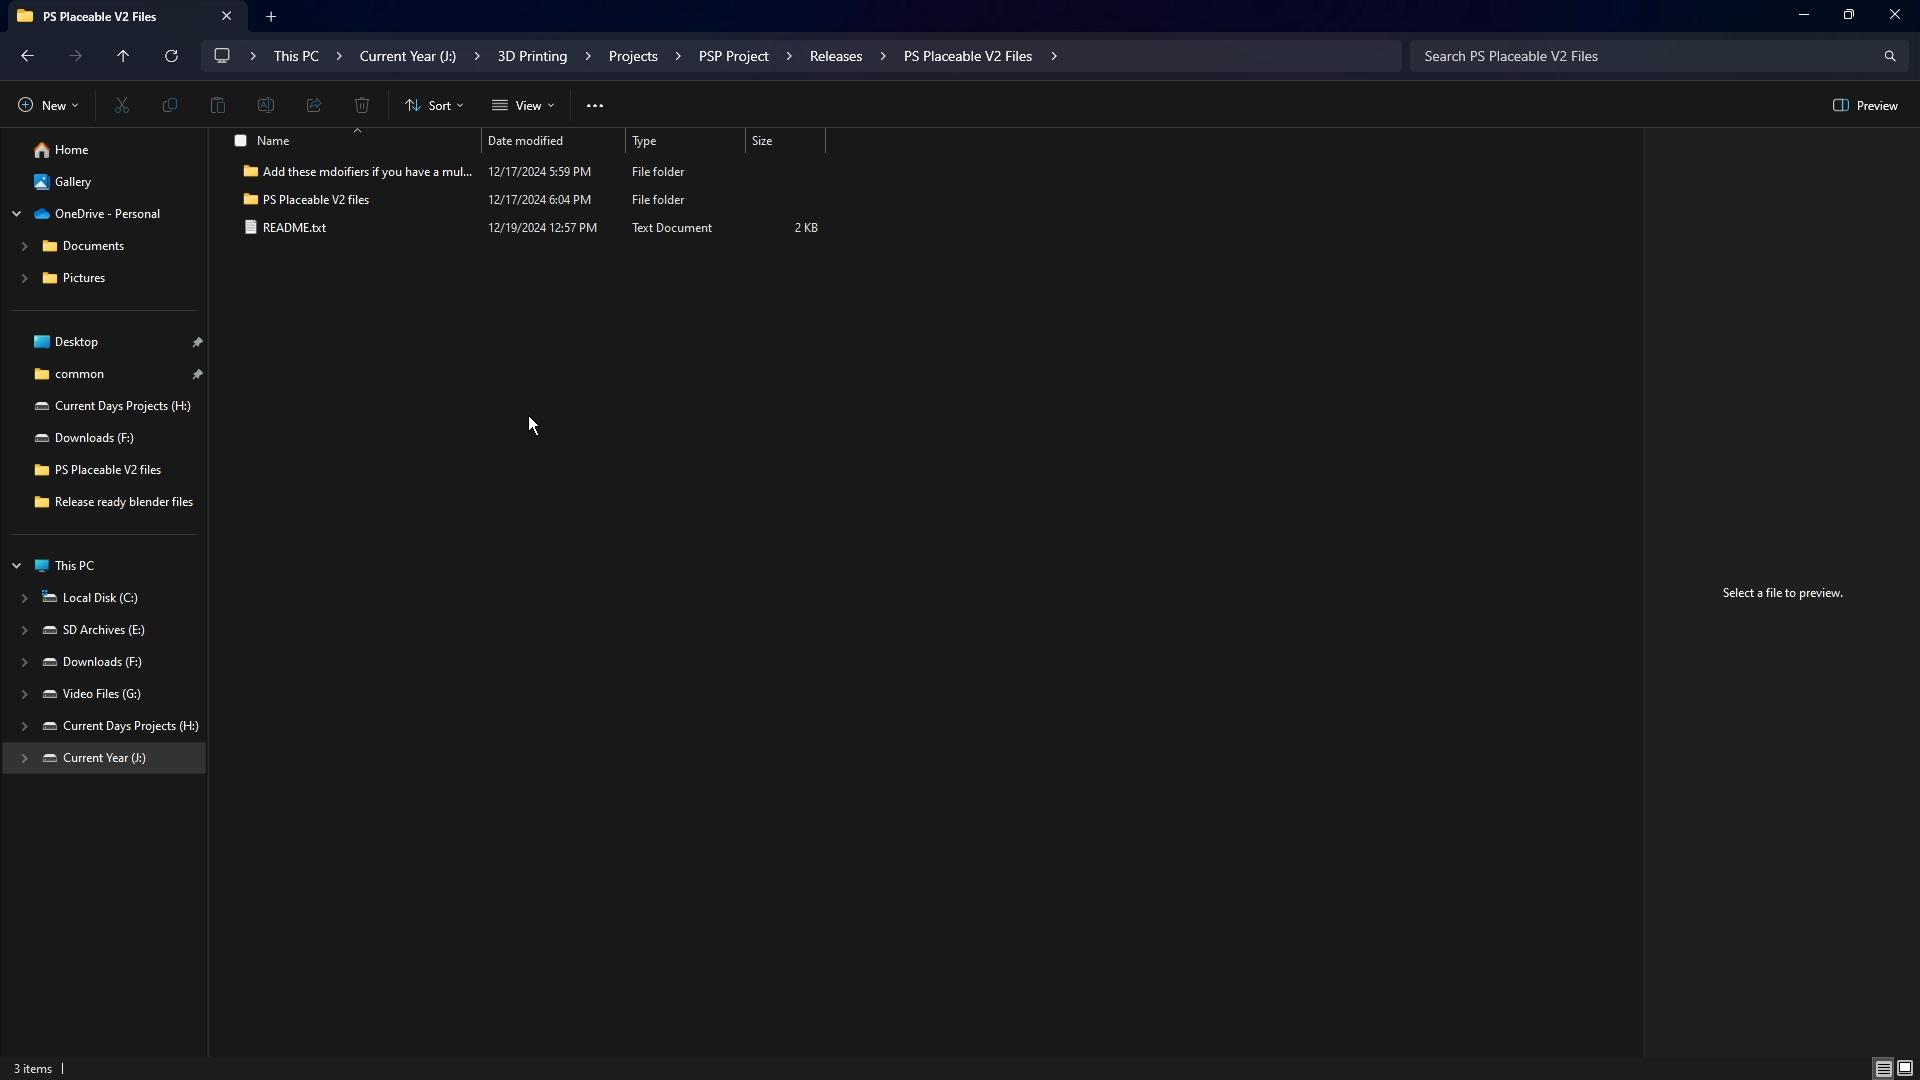
Extract your downloaded files
All the STL files are available here, there is a charge for the files. I appreciate all the support as this project has taken so much time from start to finish. If you order the files and a Mod board PCB with ribbon cables from me I will include all the added hardware needed for the shell.
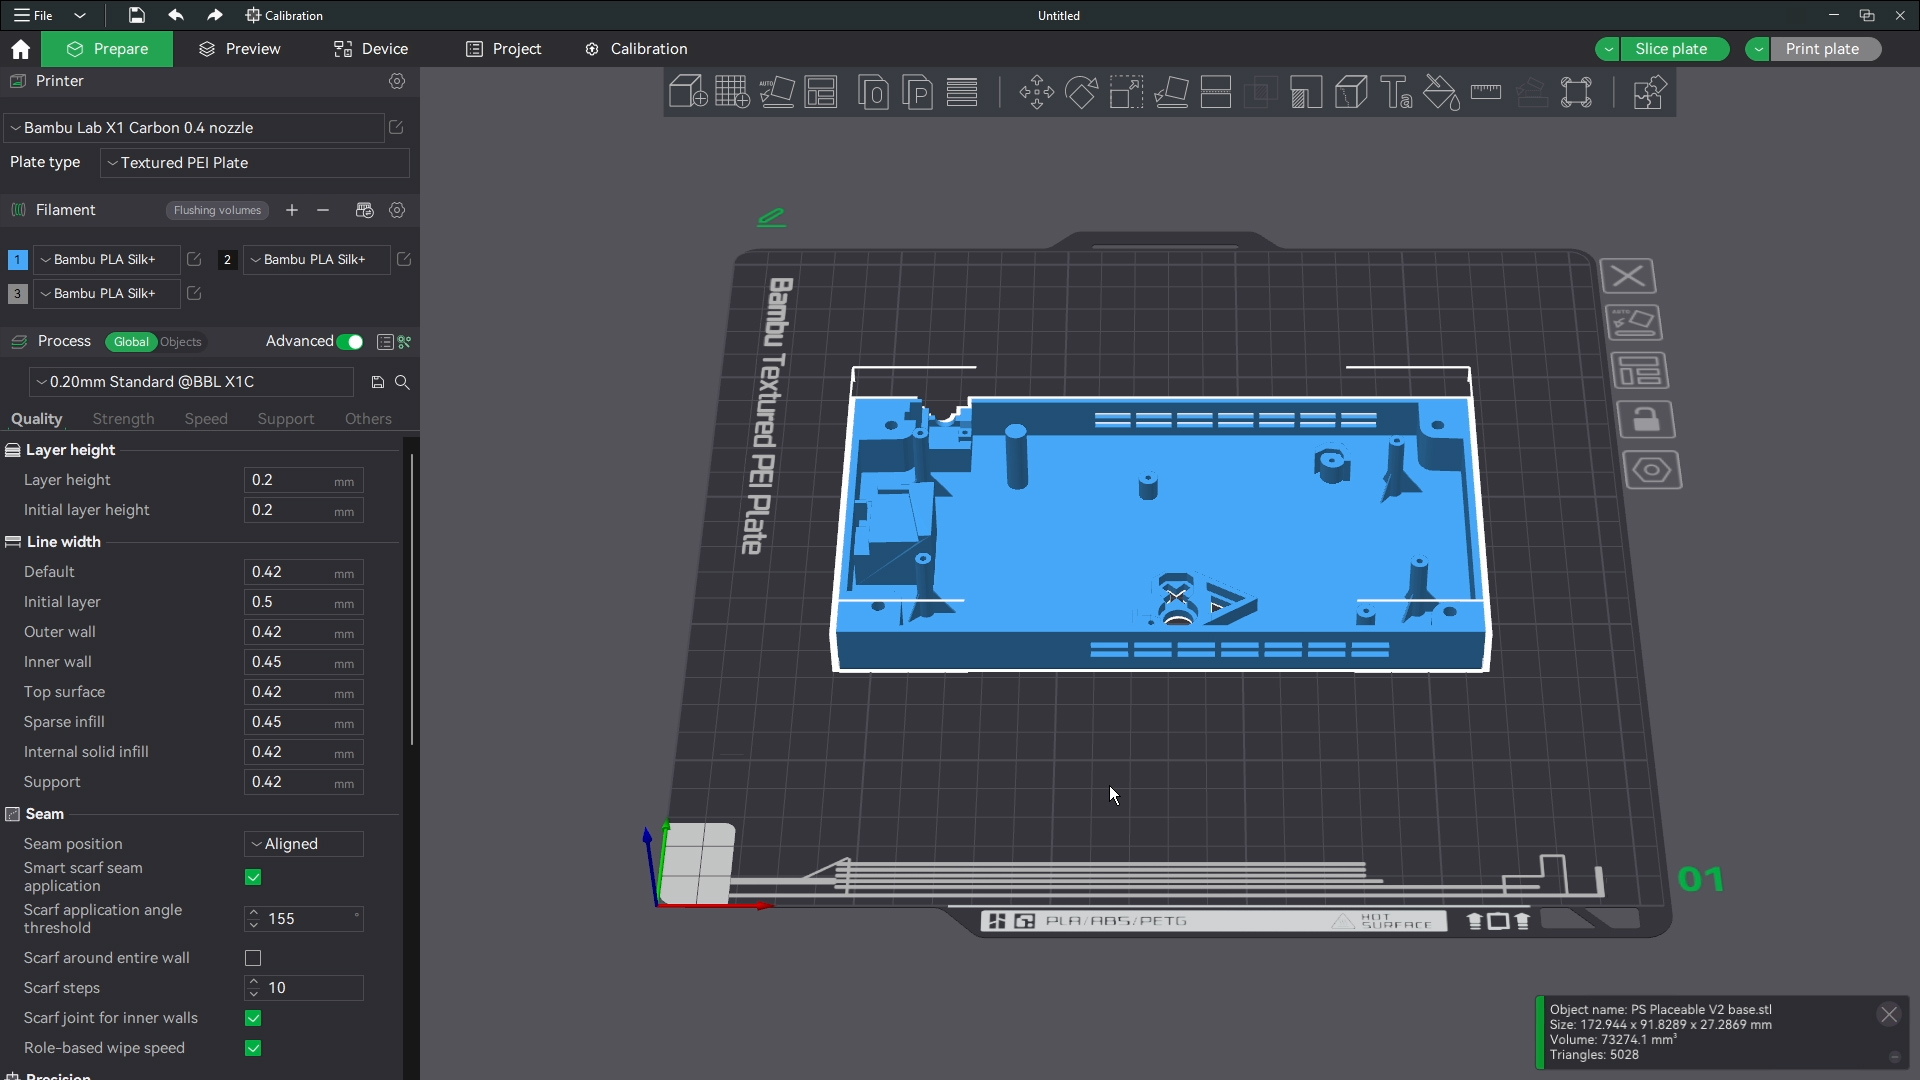
Once you have extracted the files pull up the base found in the V2 files folder.
We will start out with the base of the shell
I print these as well as the middles with two colors of plastic I will walk you through how to do the same if your printer can do so. If not that is fine. For the base you can set up the words on the bottom to be a negative part. I will explain more in a later step.
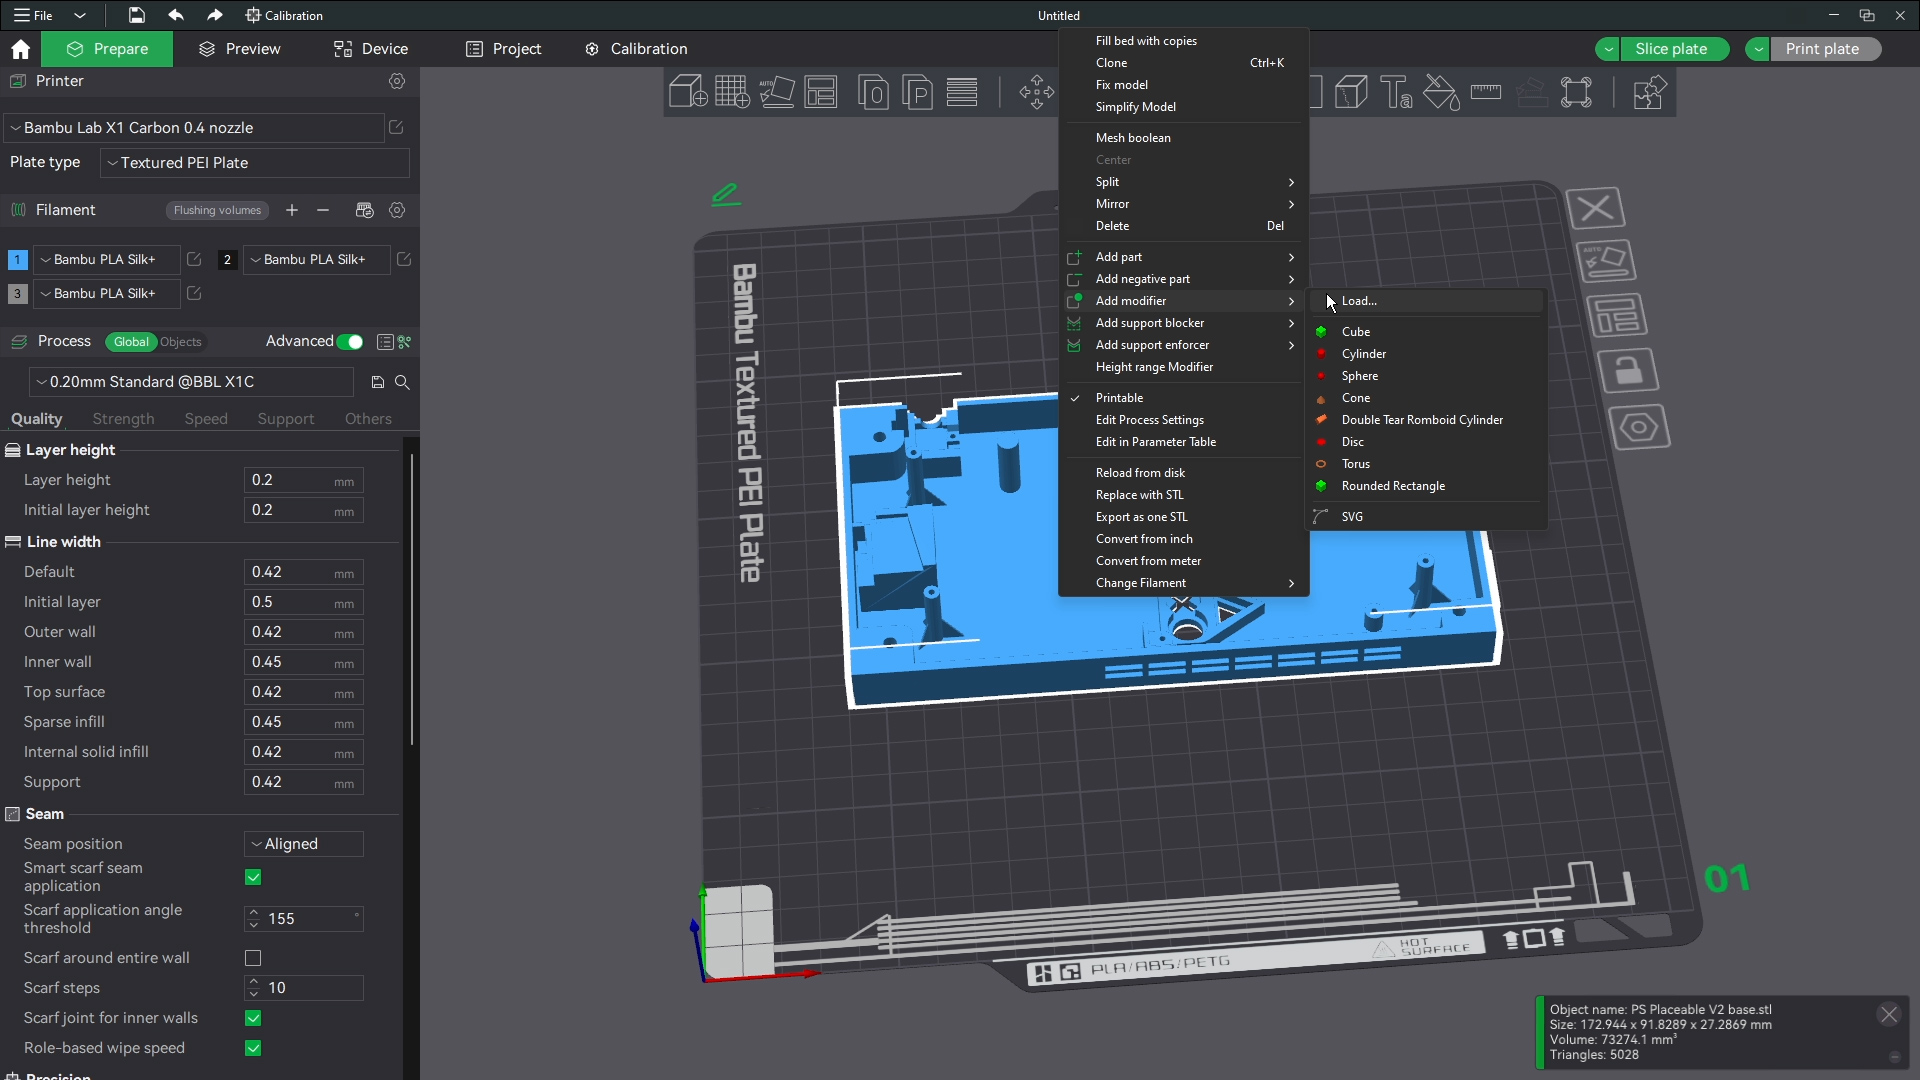
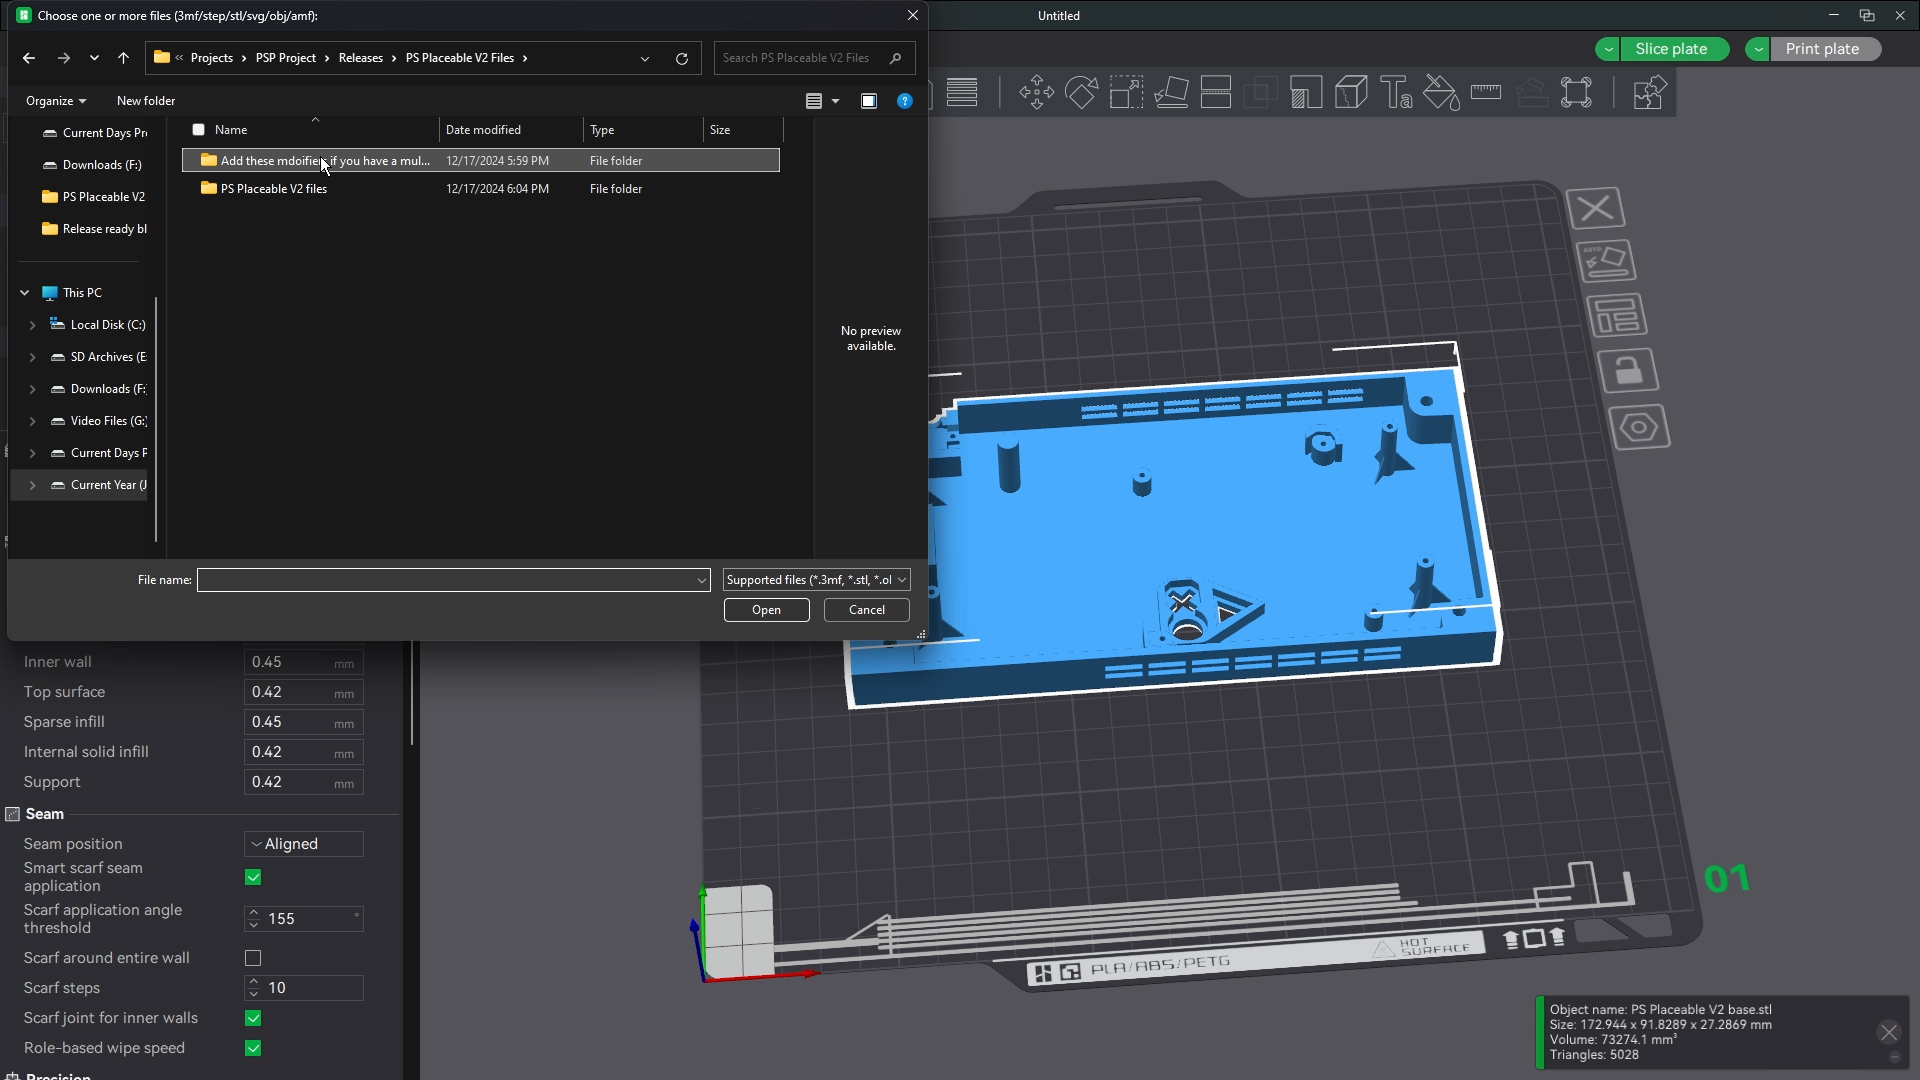
We are adding a modifier
If you right click your model (please know I am using bambu studio your slice may be very different) then hover over modifier and load. Then go to the file that is marked base modifier
The modifiers are in their own folder
If you cant see the modifiers, they are in their own folder at the root of the zipped file.
Move the modifier into place
Place the modifier in line with the buttons they match up to boot lines up with triangle and the other two will be in the correct spots.
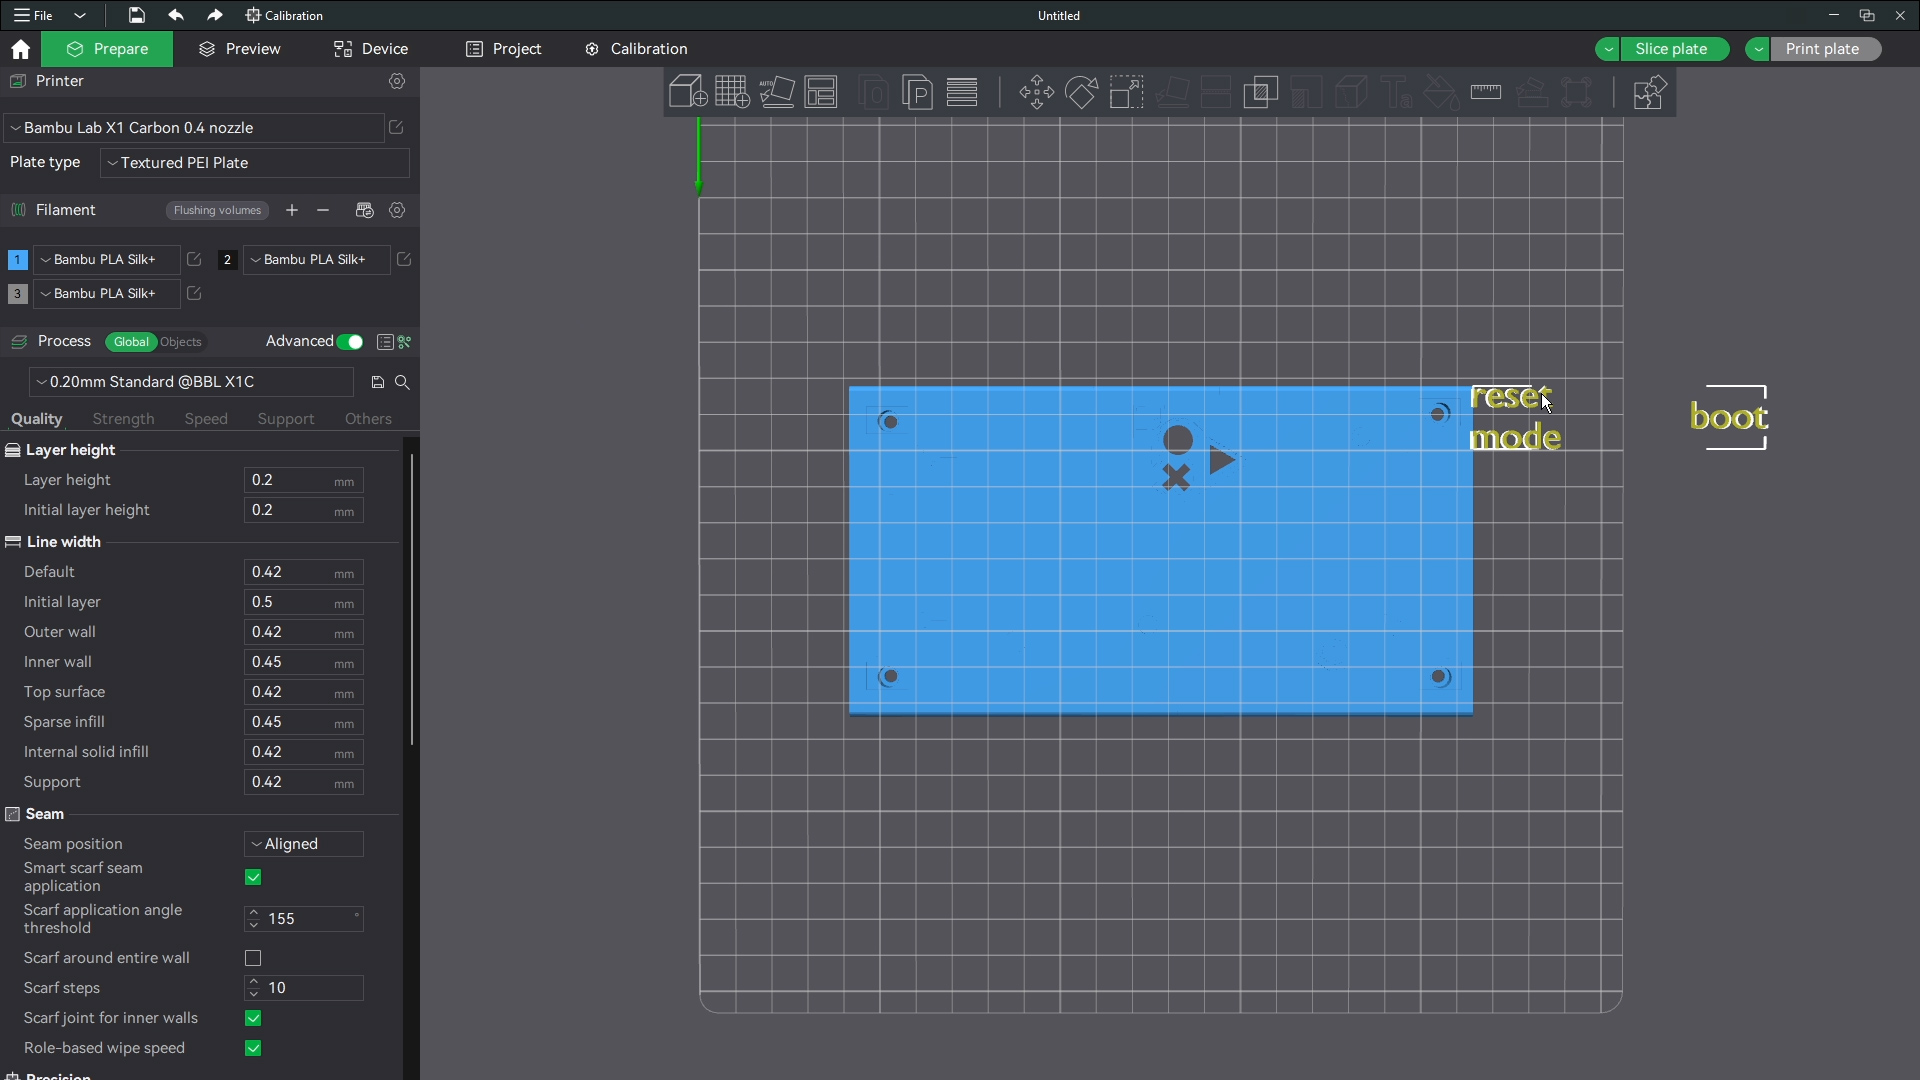
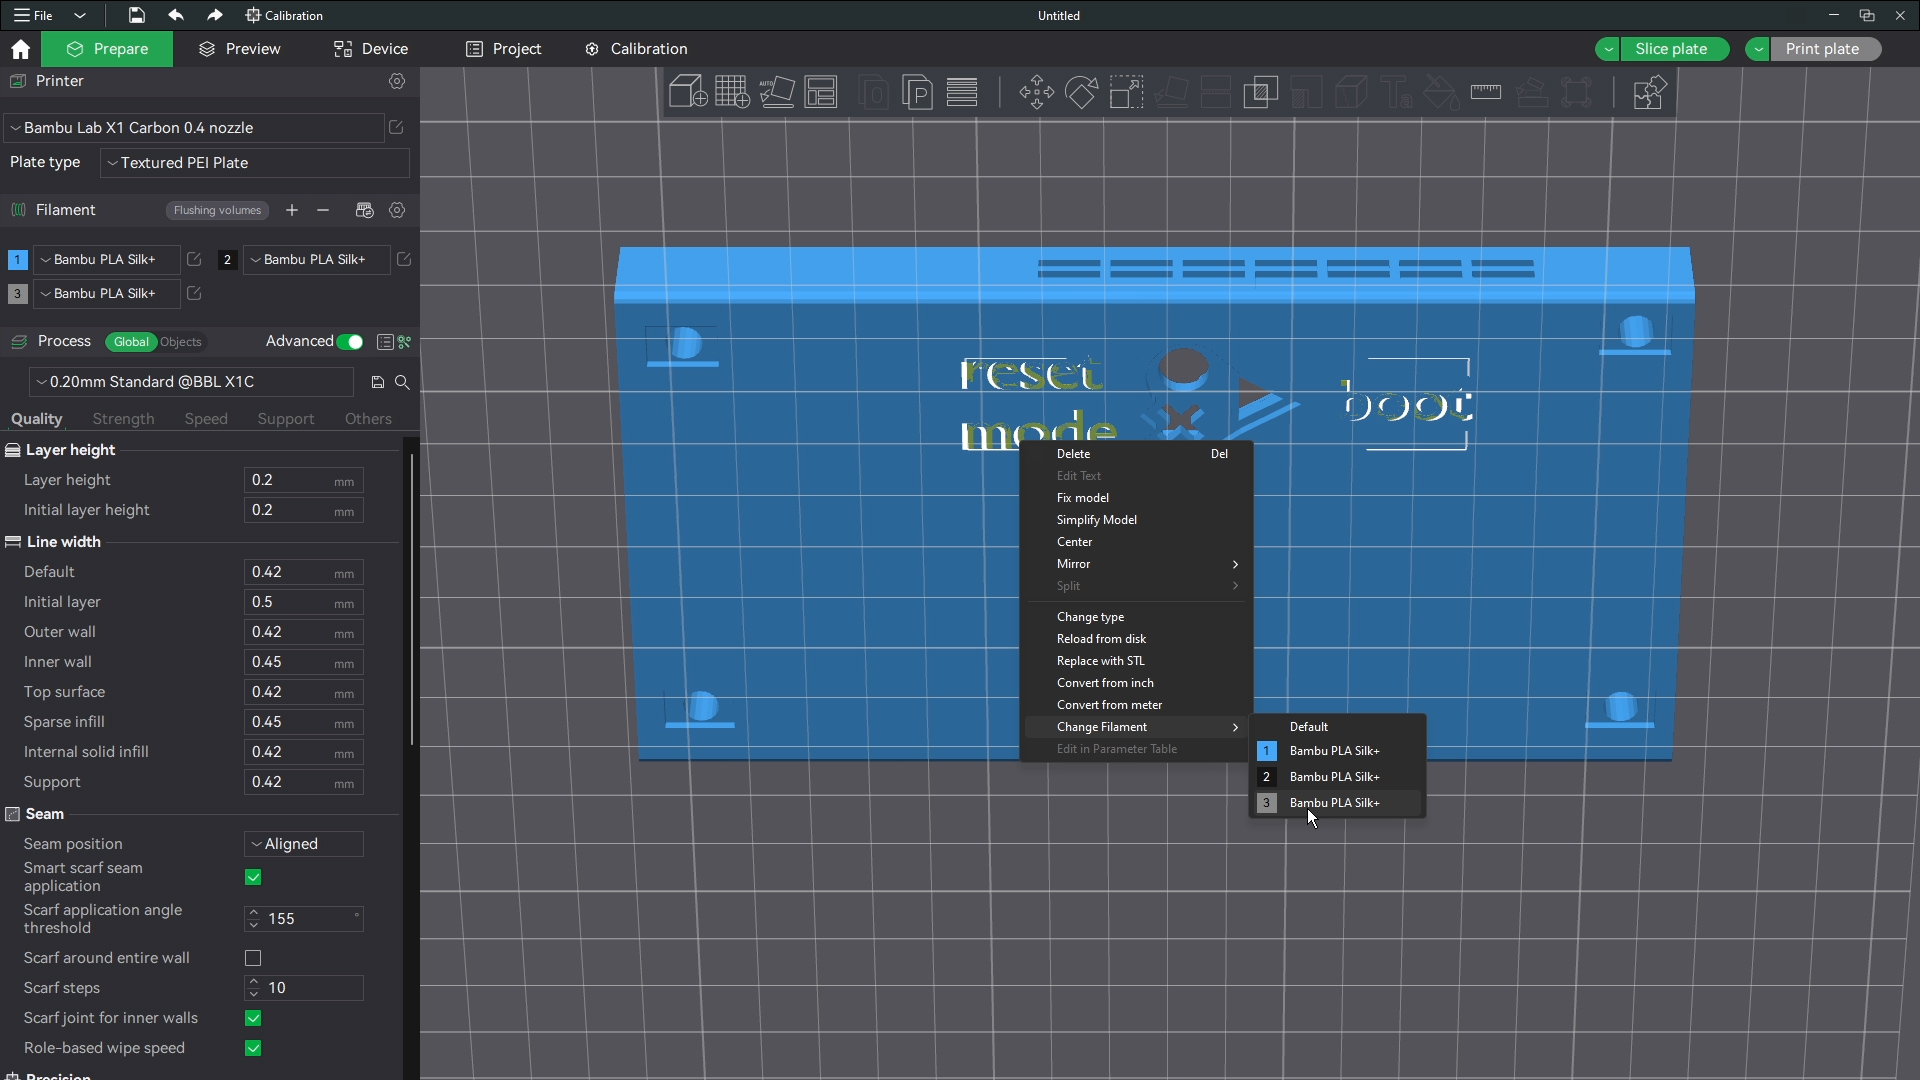
Set the new color of the modifier
Simply right click the modifier or click on it in the object panel on the left and change its filament to the color of your choosing.
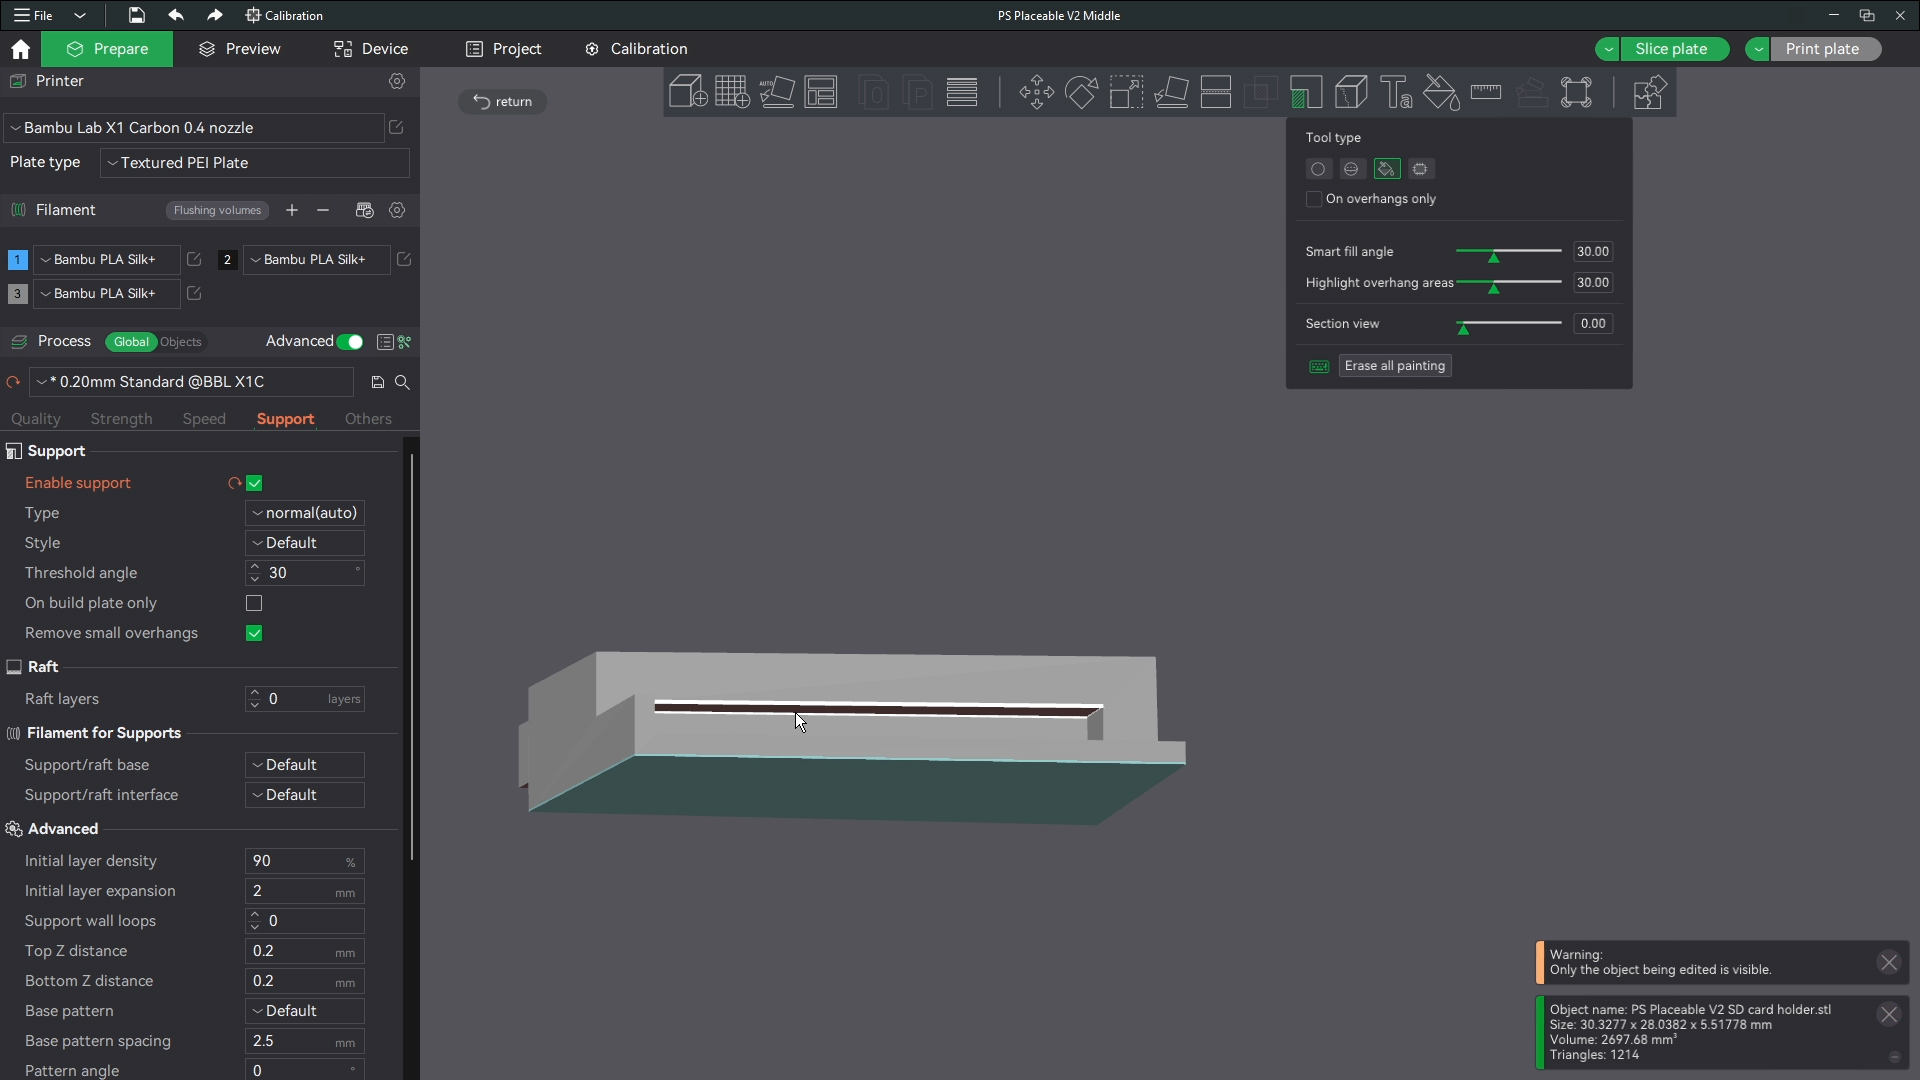
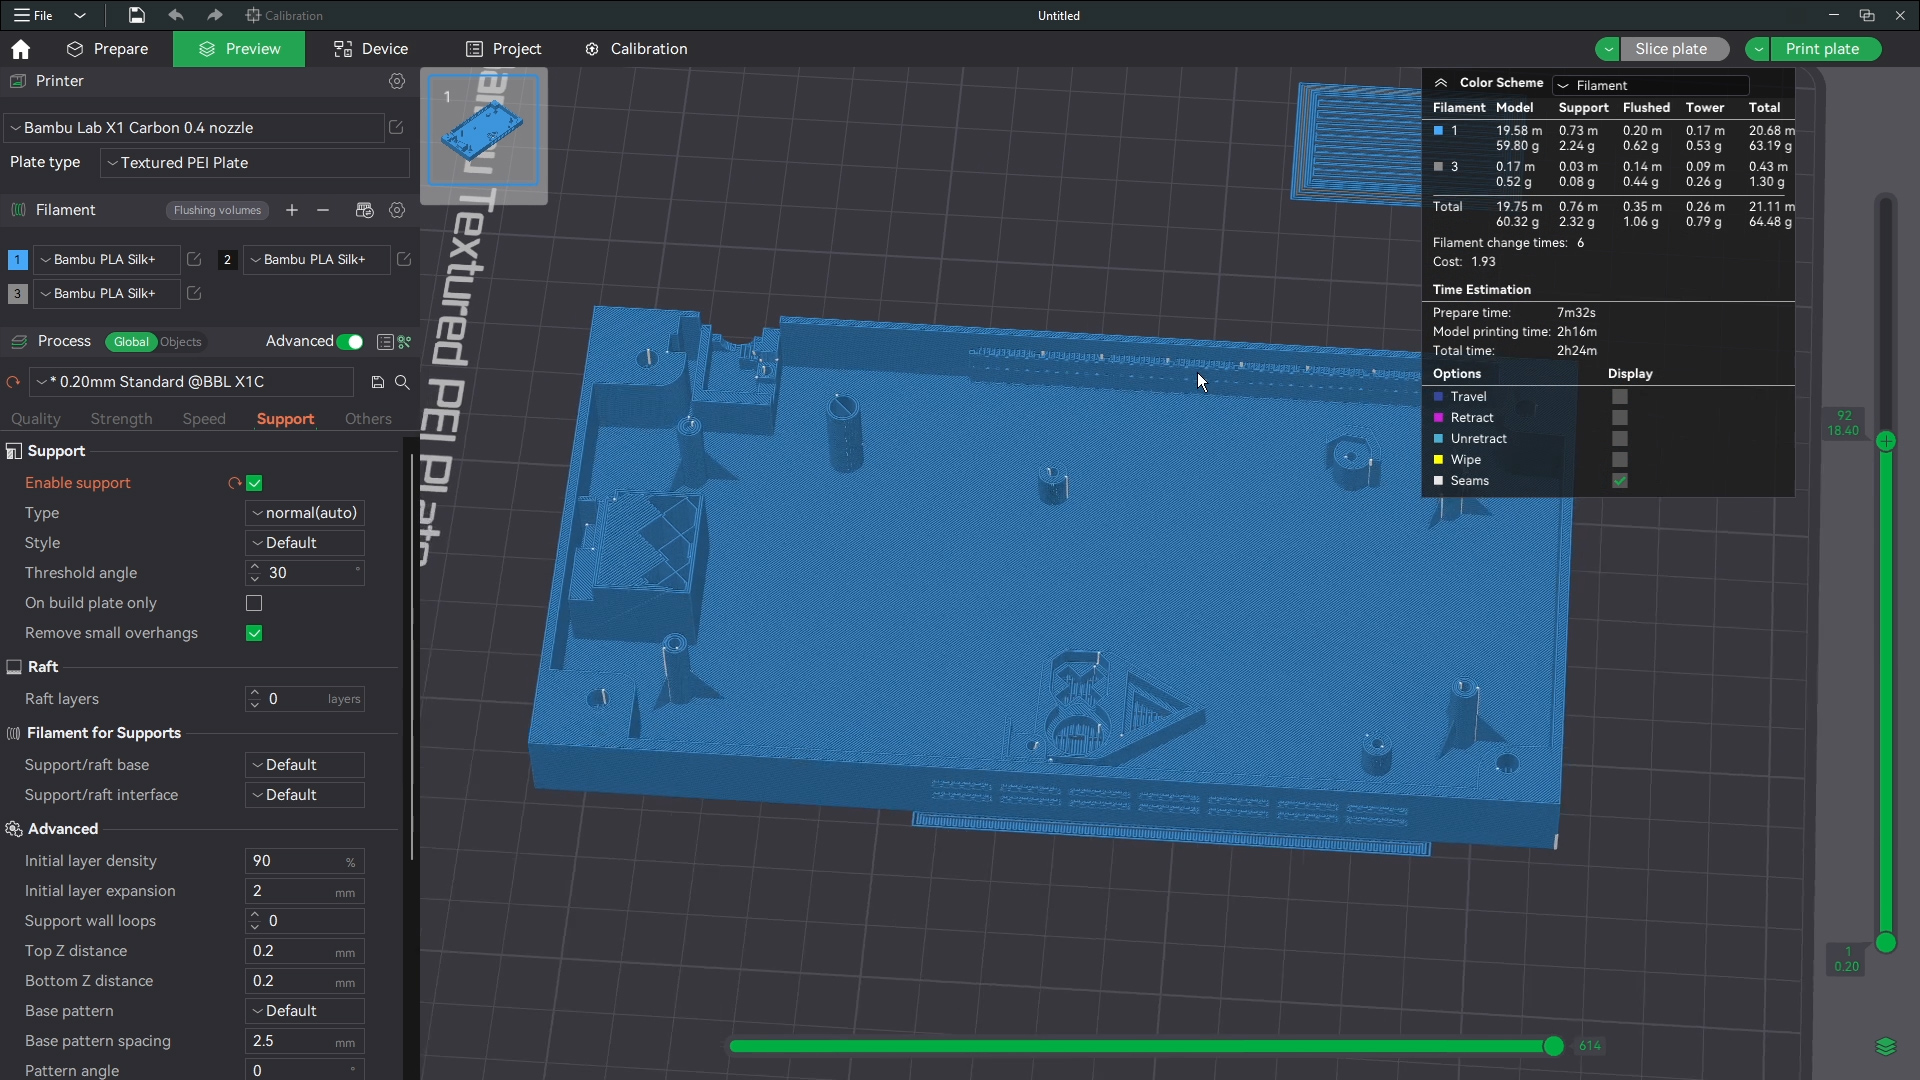
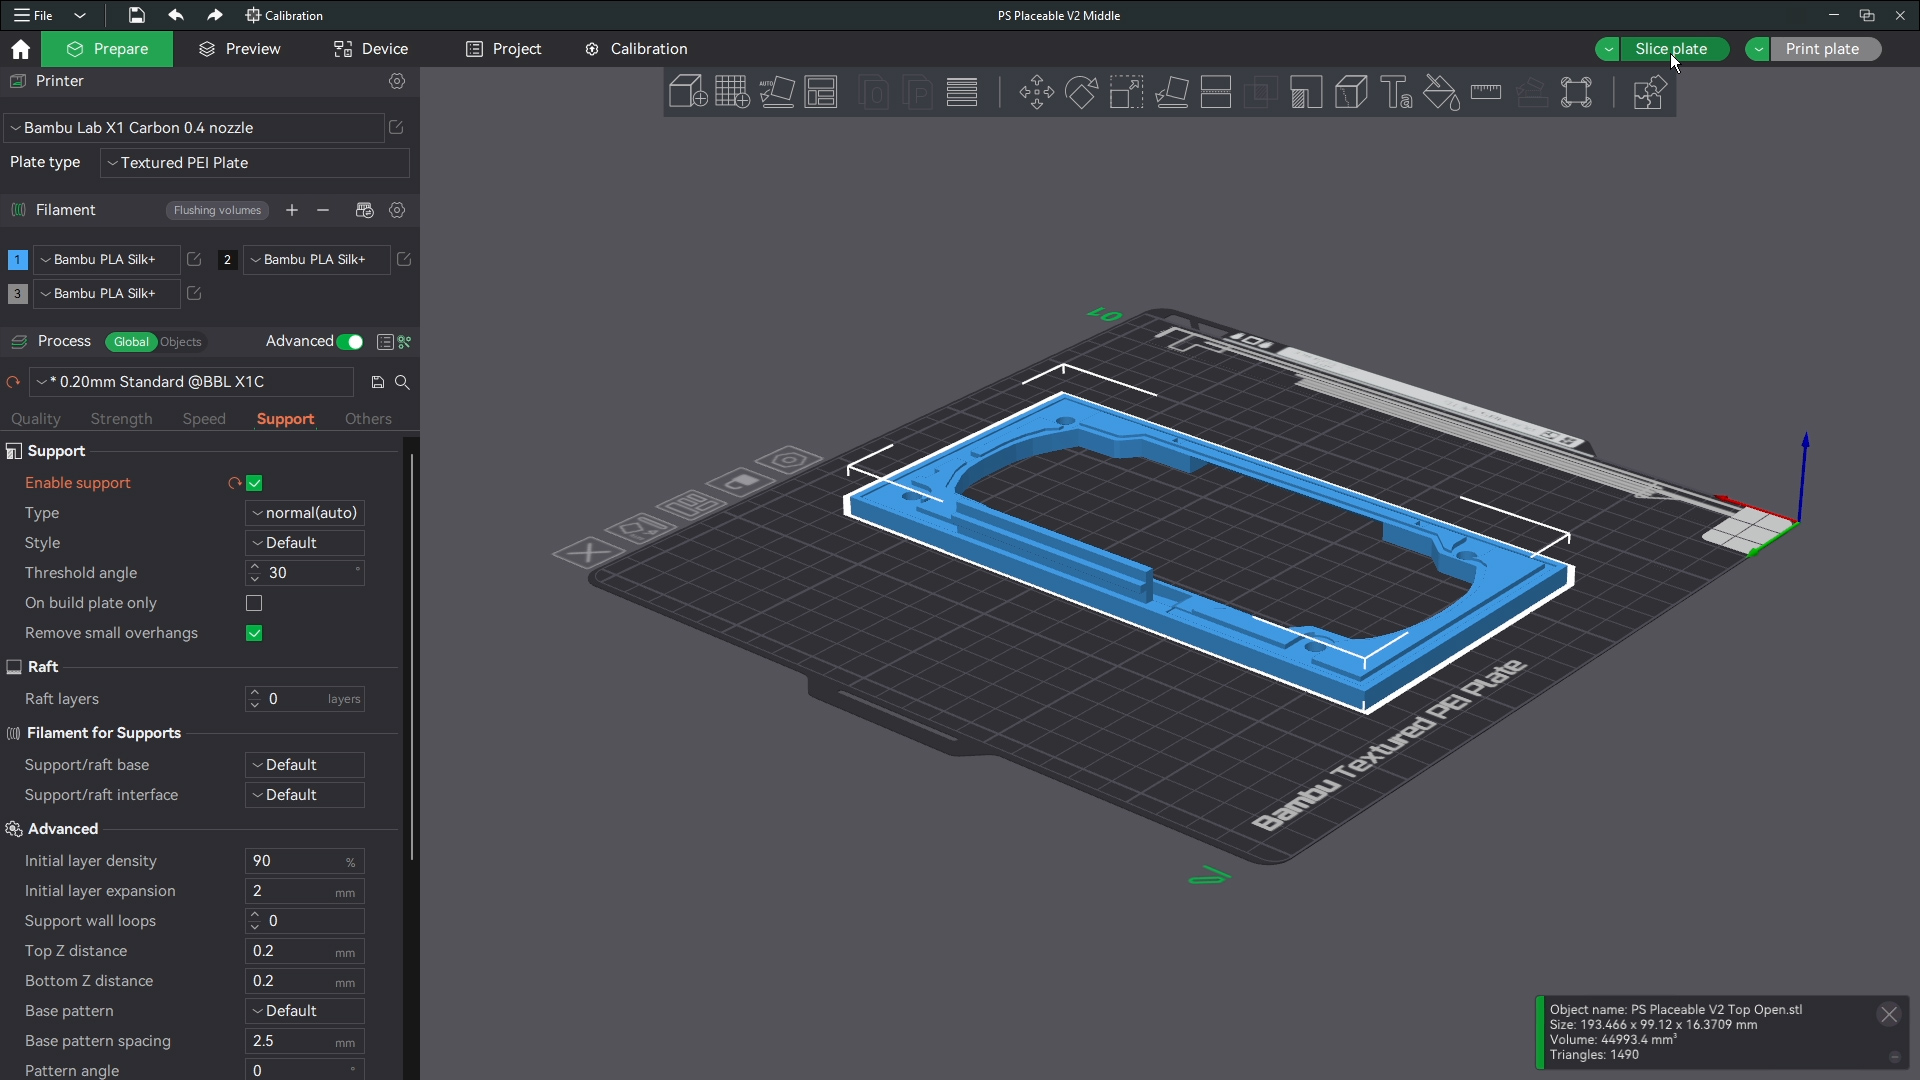
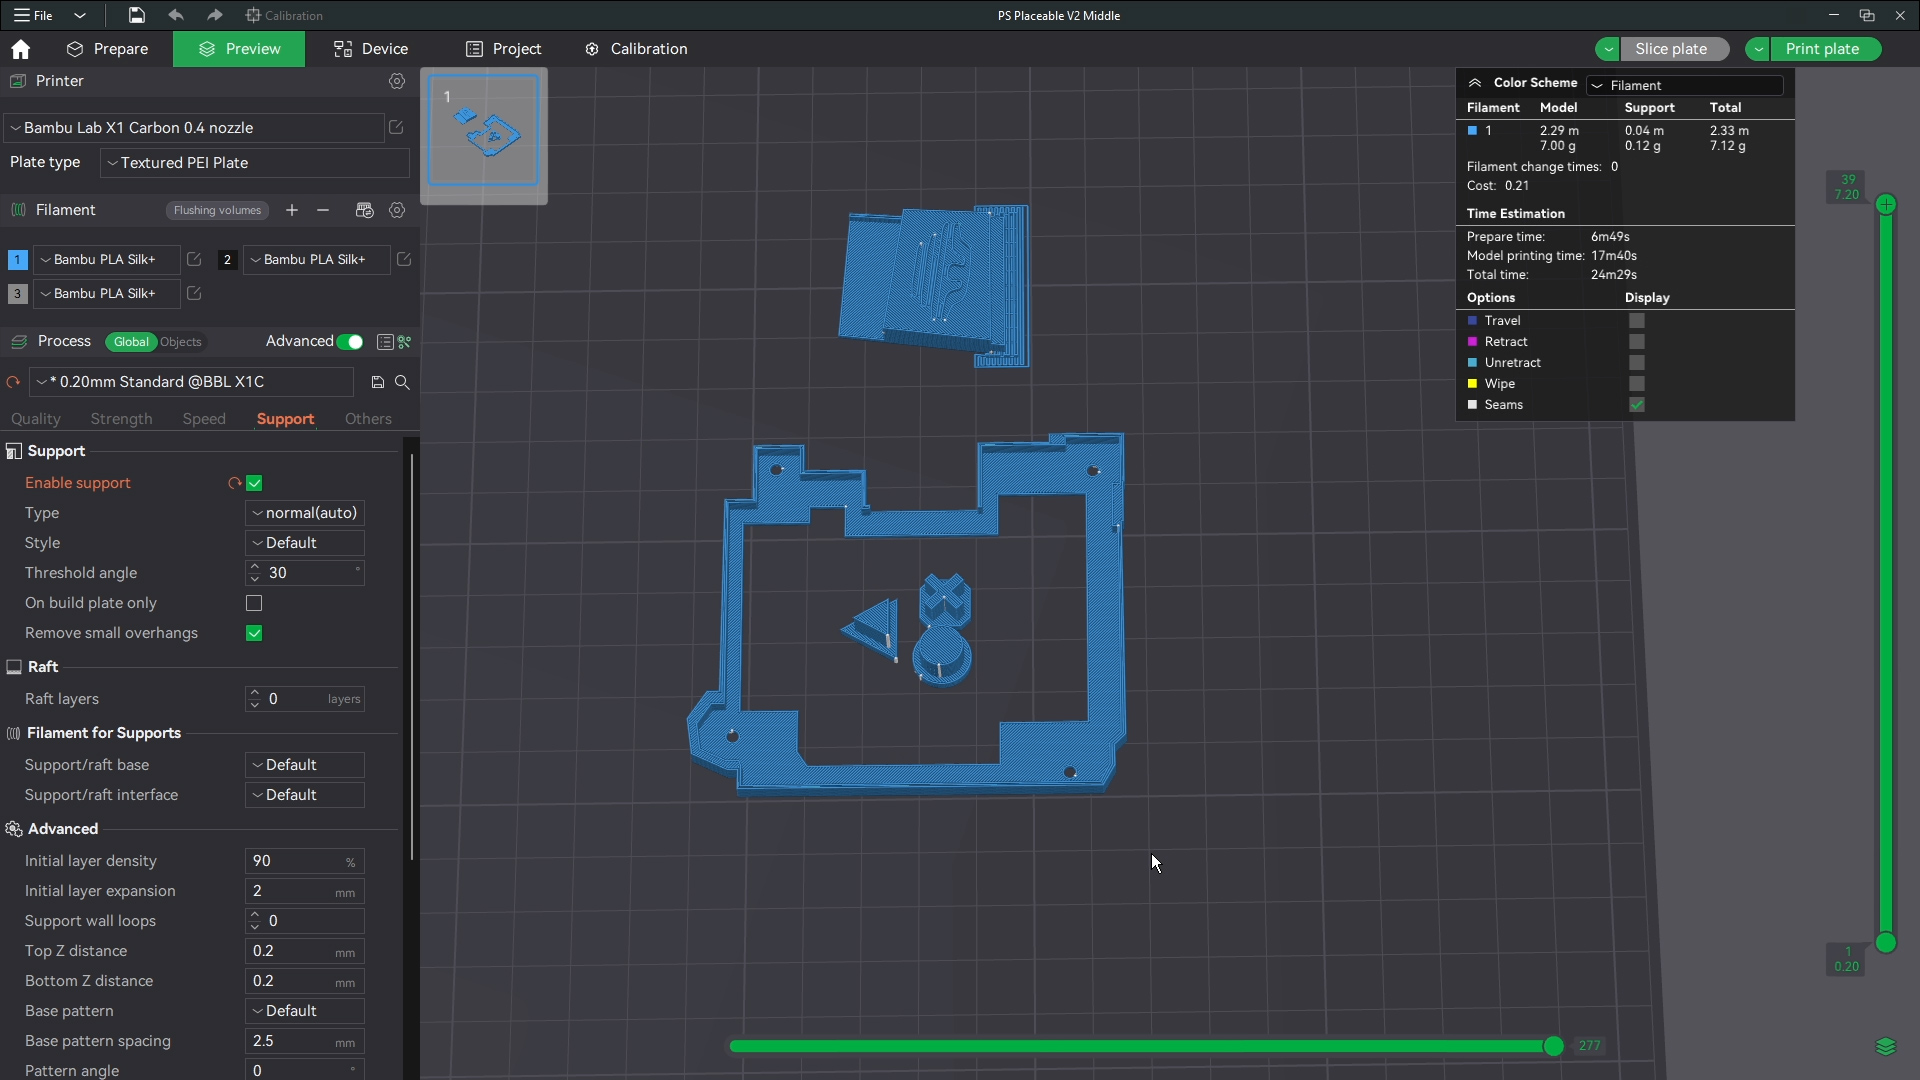
If we slice though we can see a problem with supports
The auto supports will generate supports for the vents. We do need supports for the corners of the base but not for the vents.
Remove supports
Bambu studio lets you paint with a sphere that's what I use to remove the supports here holding right click and painting over the areas I don't want to generate supports.
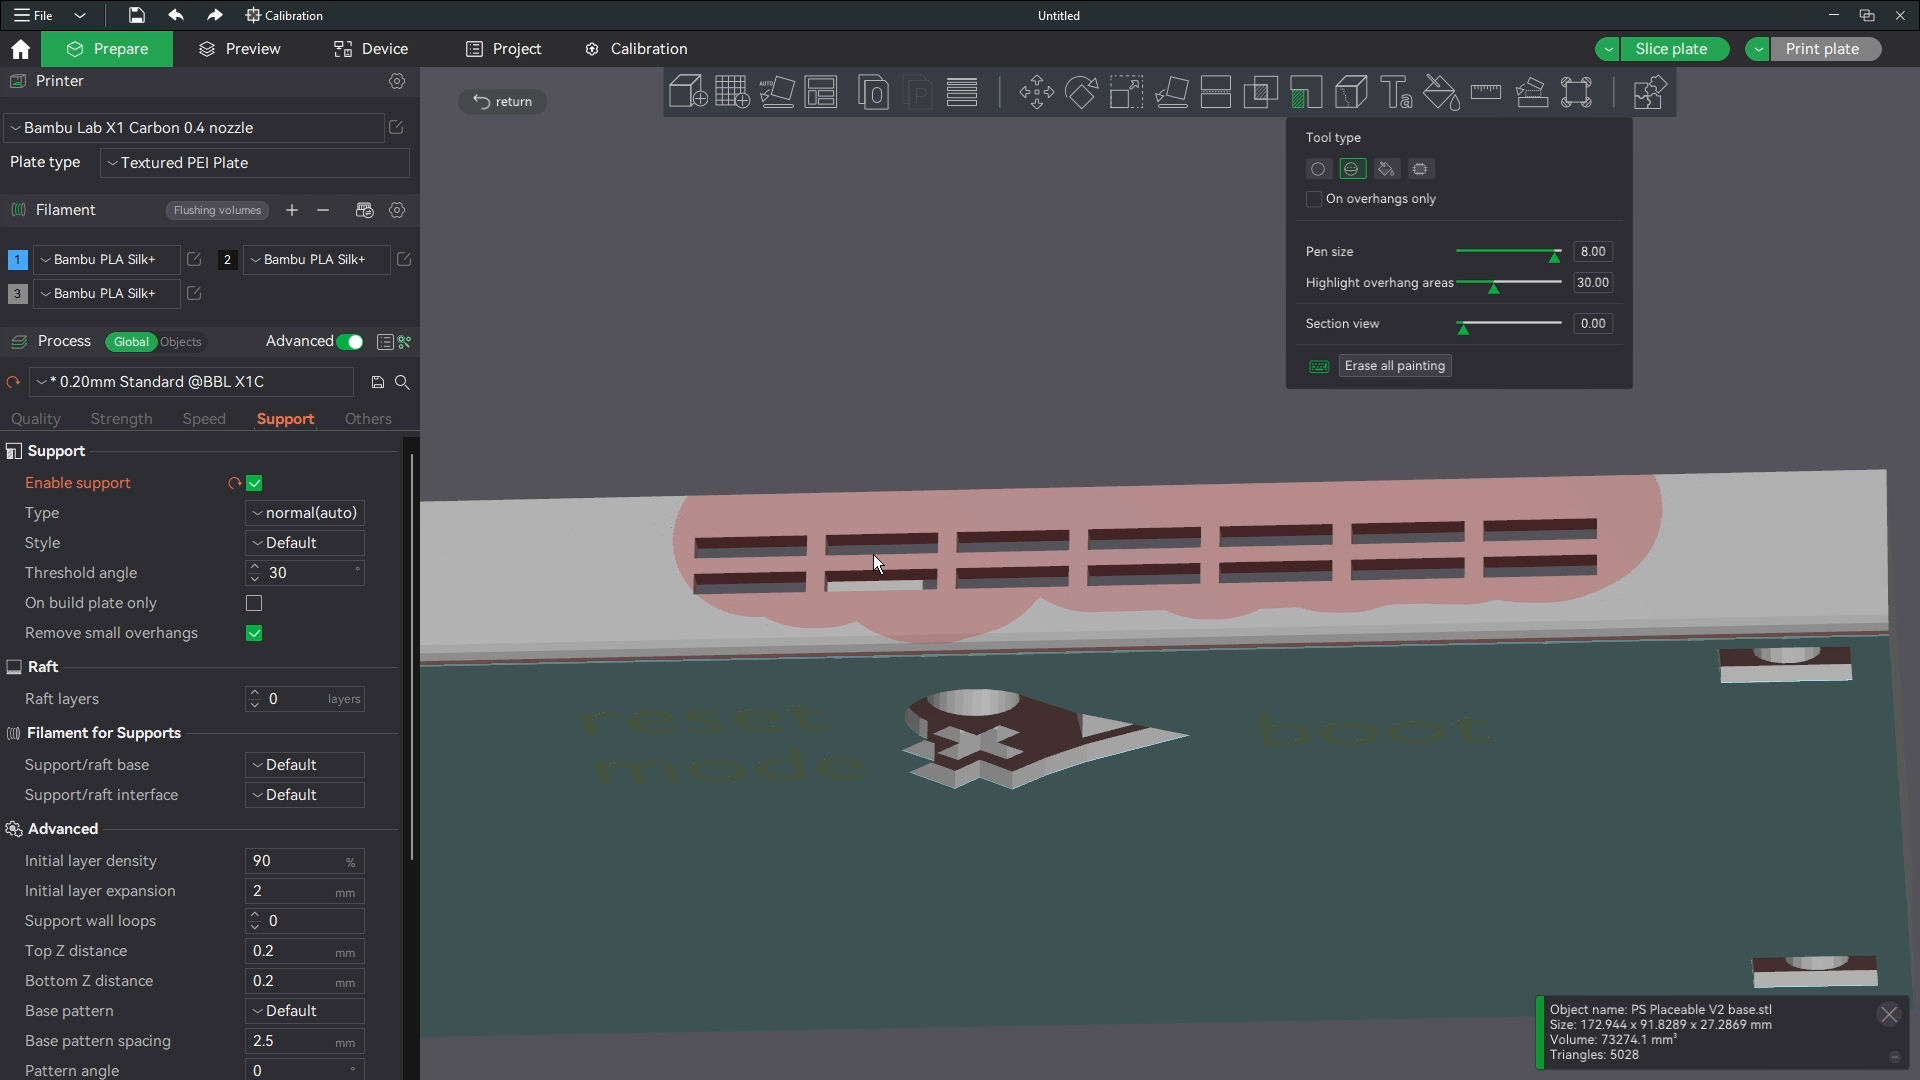
Air vents open
The printer shouldnt have an issue bridging these short gaps saving you the time from removing a ton of supports. Make sure though that the base and corners of the base have support around those parts where the buttons and screws will go. Then this is ready to print. I print all files with generic settings for which ever filament I am using and I use standard 0.2 mm settings for line height. All defaults in bambu studio.

Lets move up to the middle of the shell.
We are going to work next on making the PSP logo the matching silver color to the base. Load up the middle STL file into your slicer.

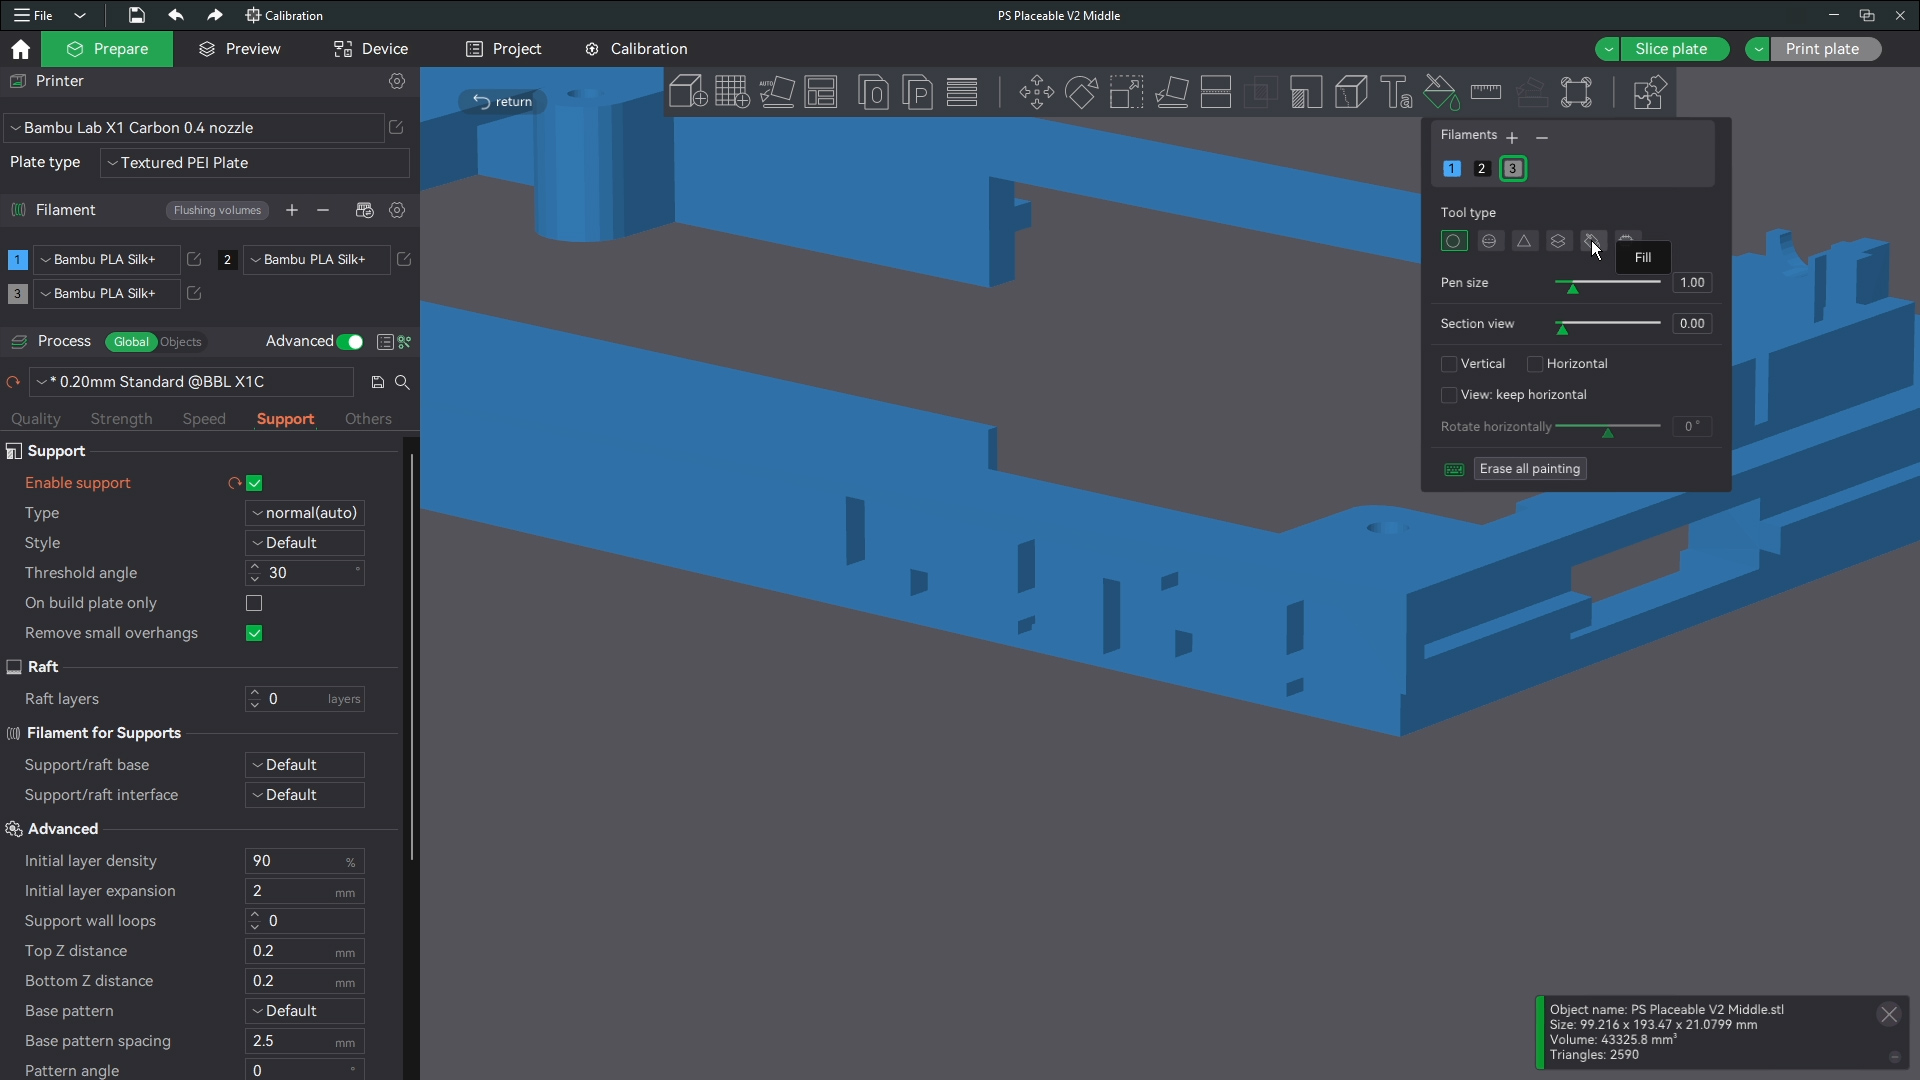
We are using the color painter
Bambu Studio lets you paint fill between edges. That is what I am using here to keep just the logo our second color.

Rotate your model to make sure you get every edge painted.
This is super important. If you miss an edge it will still print but It will take way longer and look really weird at the end.
Problem with the thin logo
Since this logo is on the thin side the slicer ends up creating a very thin connection with the base of the letter and the wall they are connected to. This will create a logo that breaks off. We will add a new modifier here to fix this.

Load in the PSP logo modifier
You will have to rotate and line the logo up with the letters just right. Then move the modifier back on the on the X axis (for me). Push it back so that it is between the letters and the blue wall. then in the object window to the left set the modifier color to the same silver we are using. Now if we slice again.
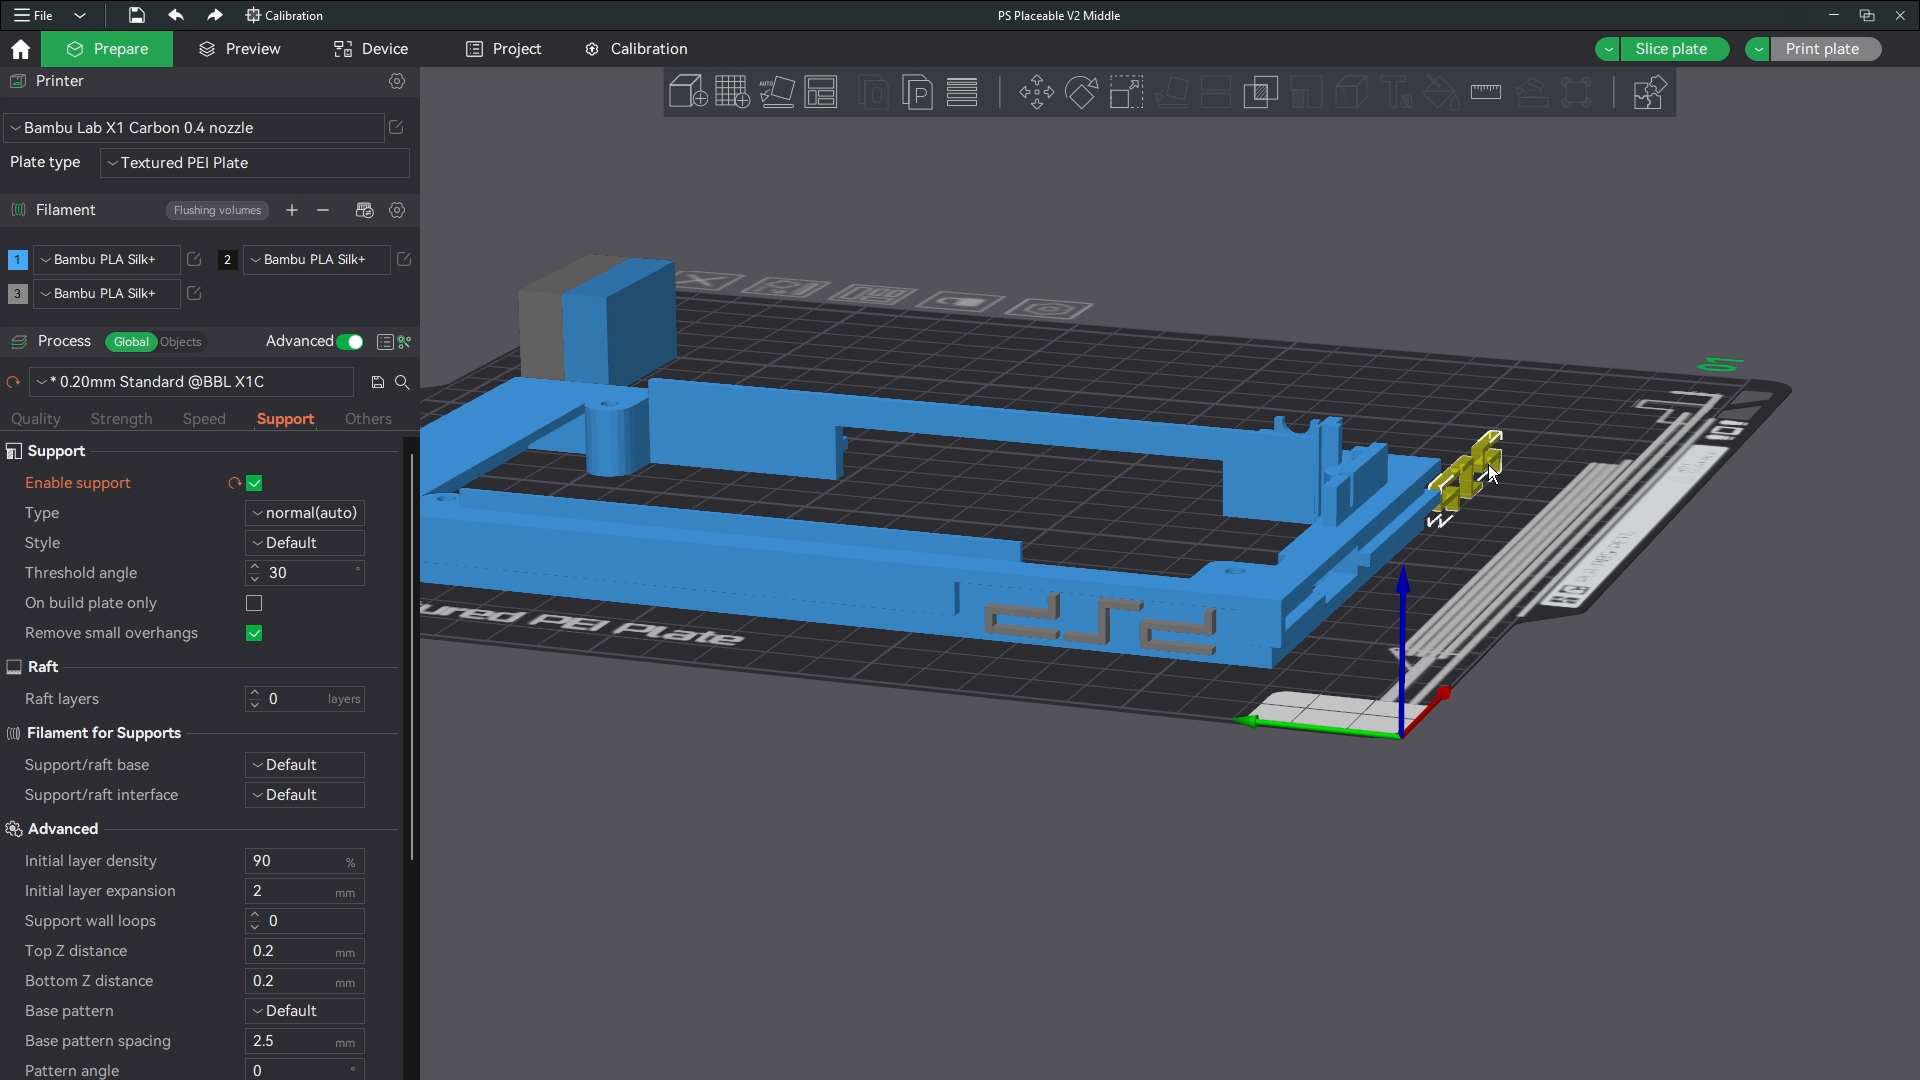
The print will now have tons of support
The layers will now get sandwiched together giving the logo the added support it needs to look just right.
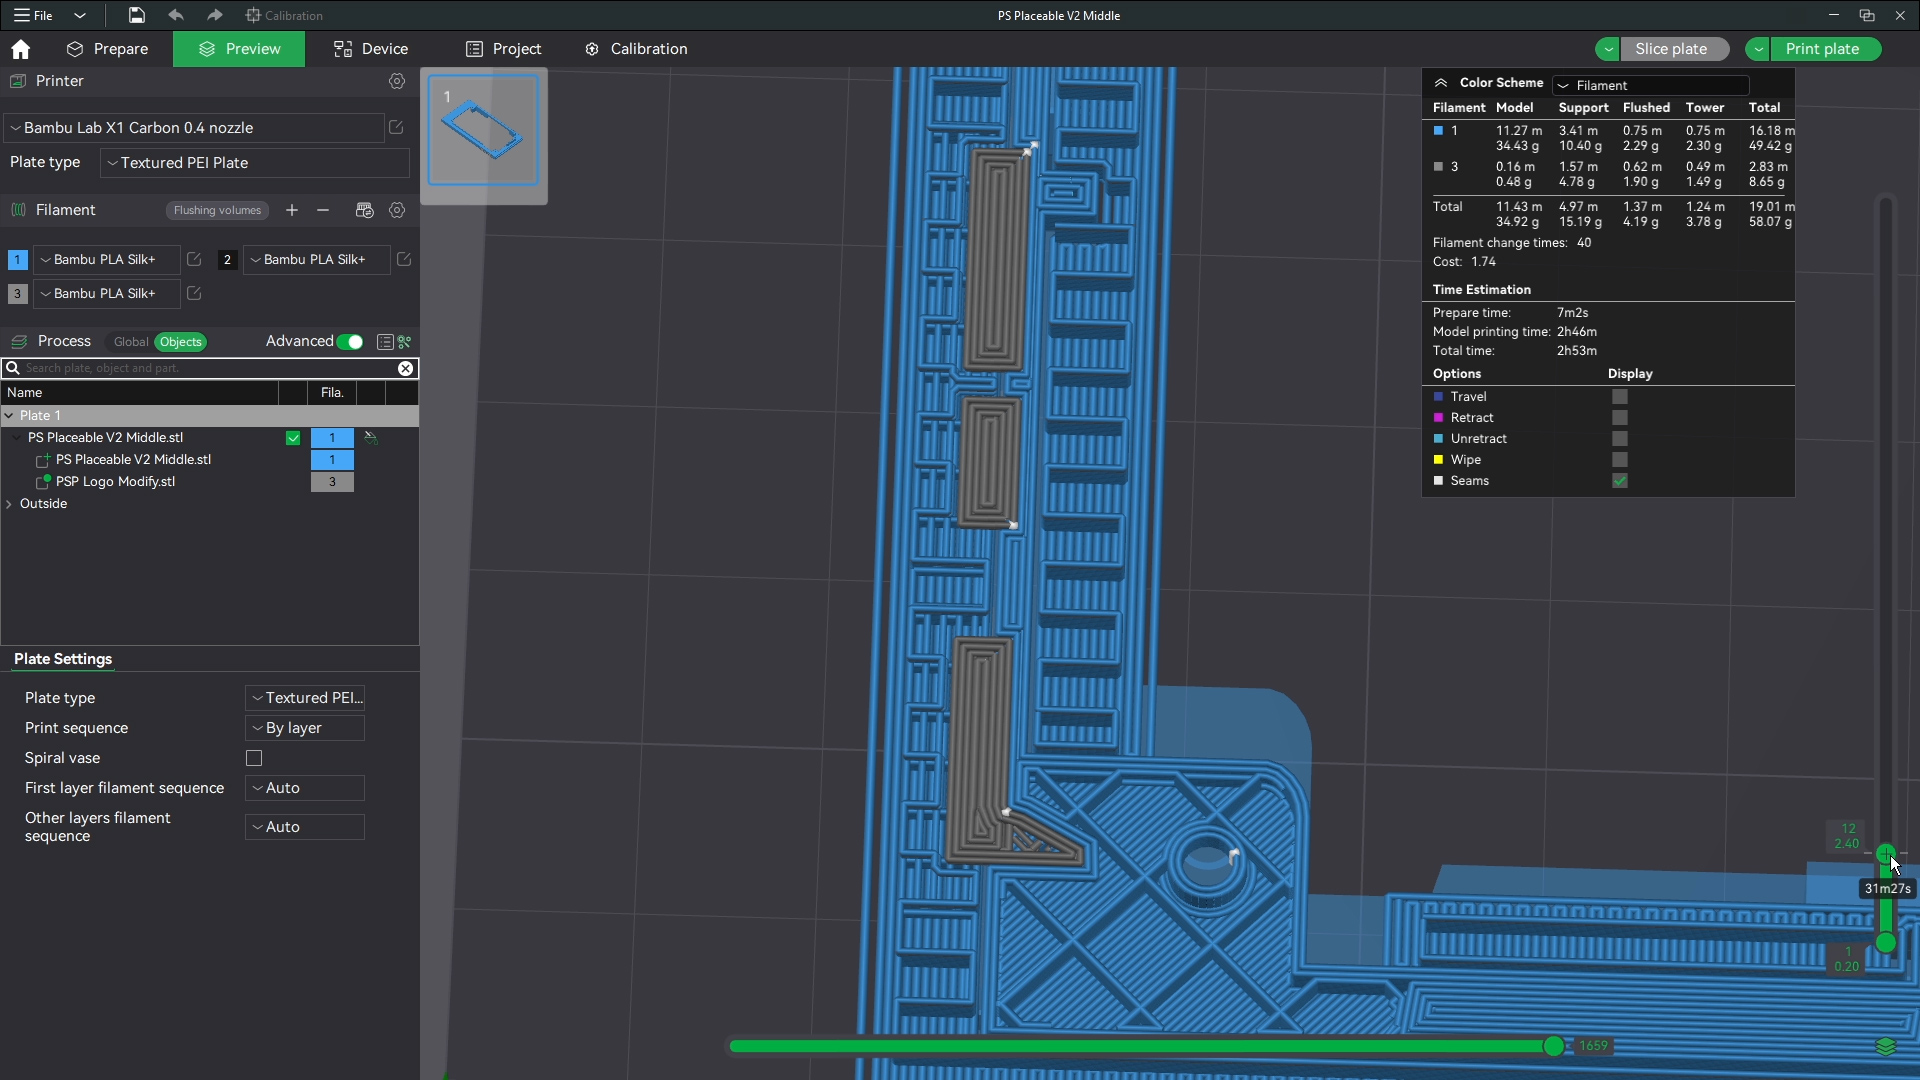
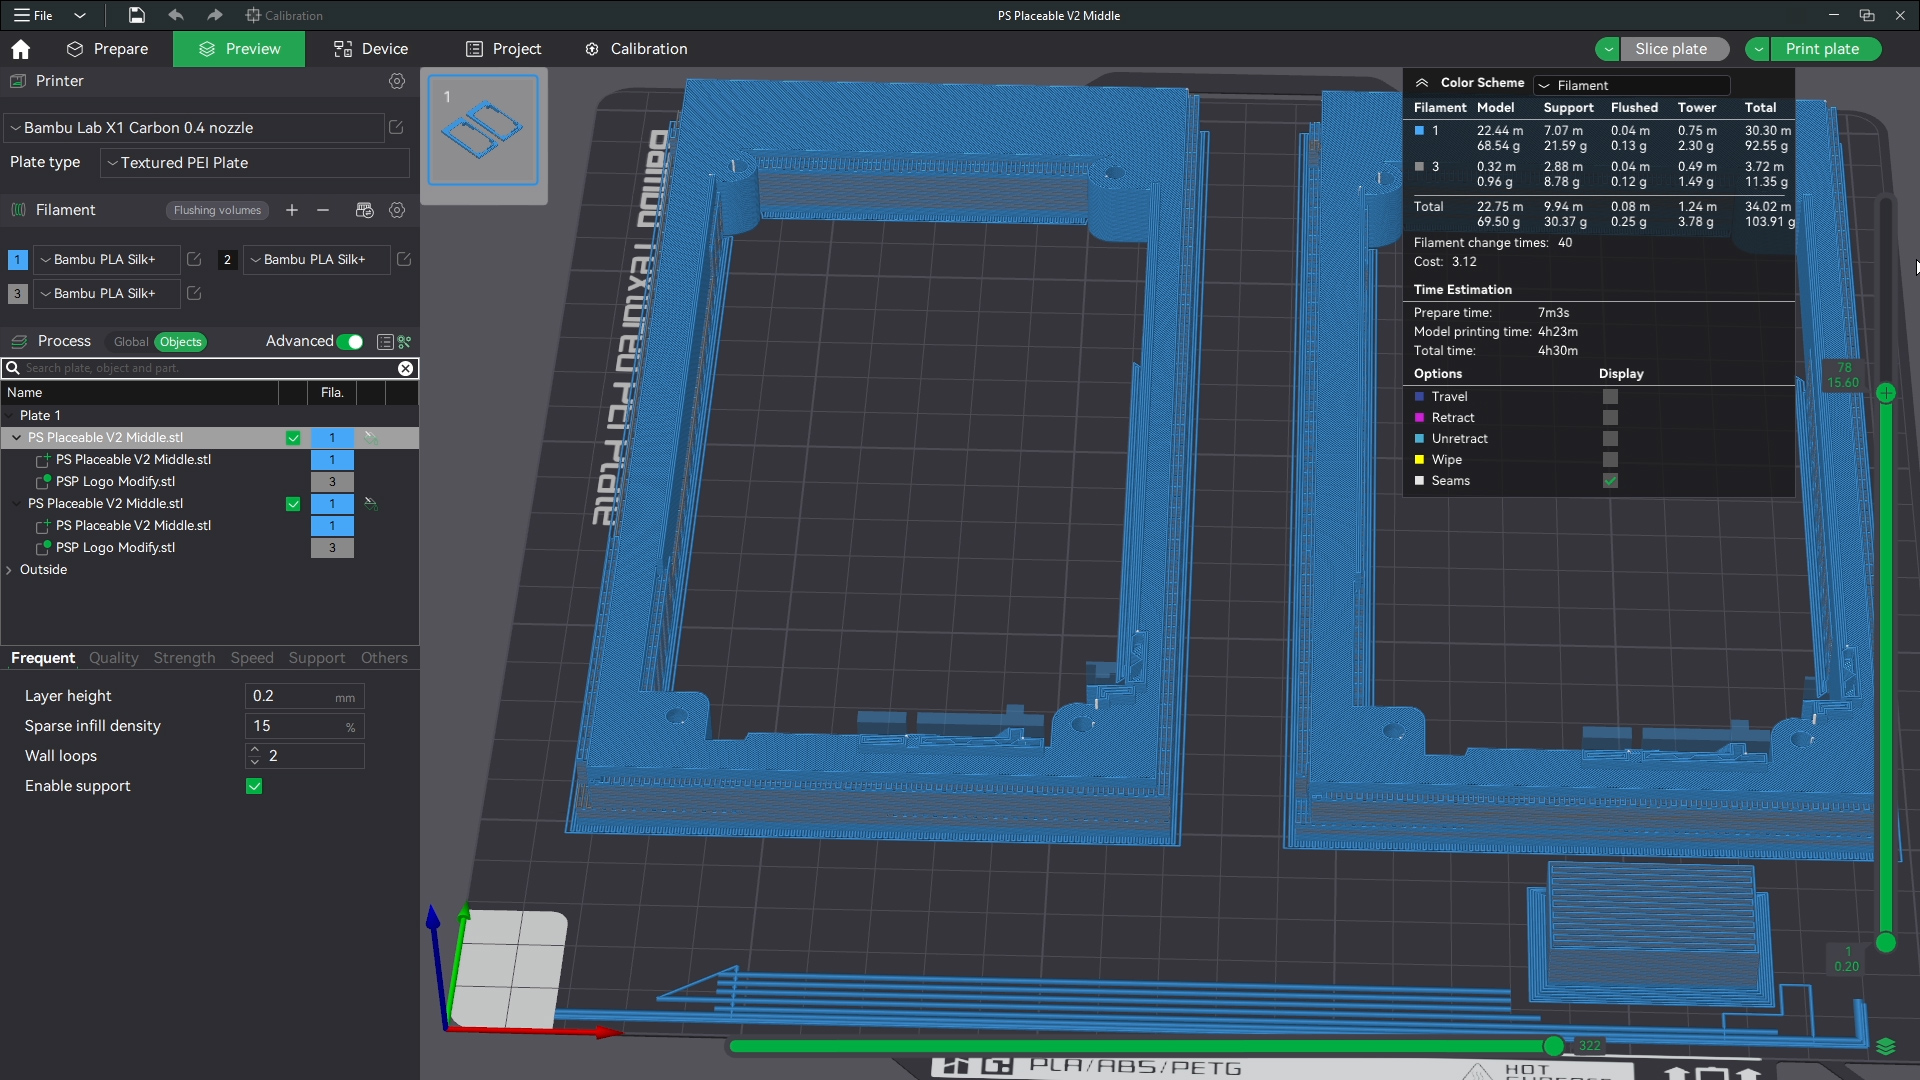
Flushing to supports
Now I print these in sets of two. You do not have to do that and in most cases wont need to I like to waste as little plastic as possible. There is no way to print the middle without supports. So that will always be a waste sadly. But we can flush our extra color to the supports. If you print two there is nearly zero waste. If you print one there will be about 4 grams of flushed plastic.
Lets print a top now
With the middle and base done we are over half way printed. Now we have to pick the top we like the most. Most people seem to like the UMD only exposed but I figure for people (myself included who want to use broken special edition PSP's we want the whole thing exposed. This top gives you that ability. This top works for either 3K or 2K versions of the PSP.
Closed top for only seeing the UMD drive
This top is great for a lot of reasons. People think it looks more like a finished product, I am more practical and like that if you are missing the OEM battery cover you can just leave it open and place this top over not ever having to worry about that again.
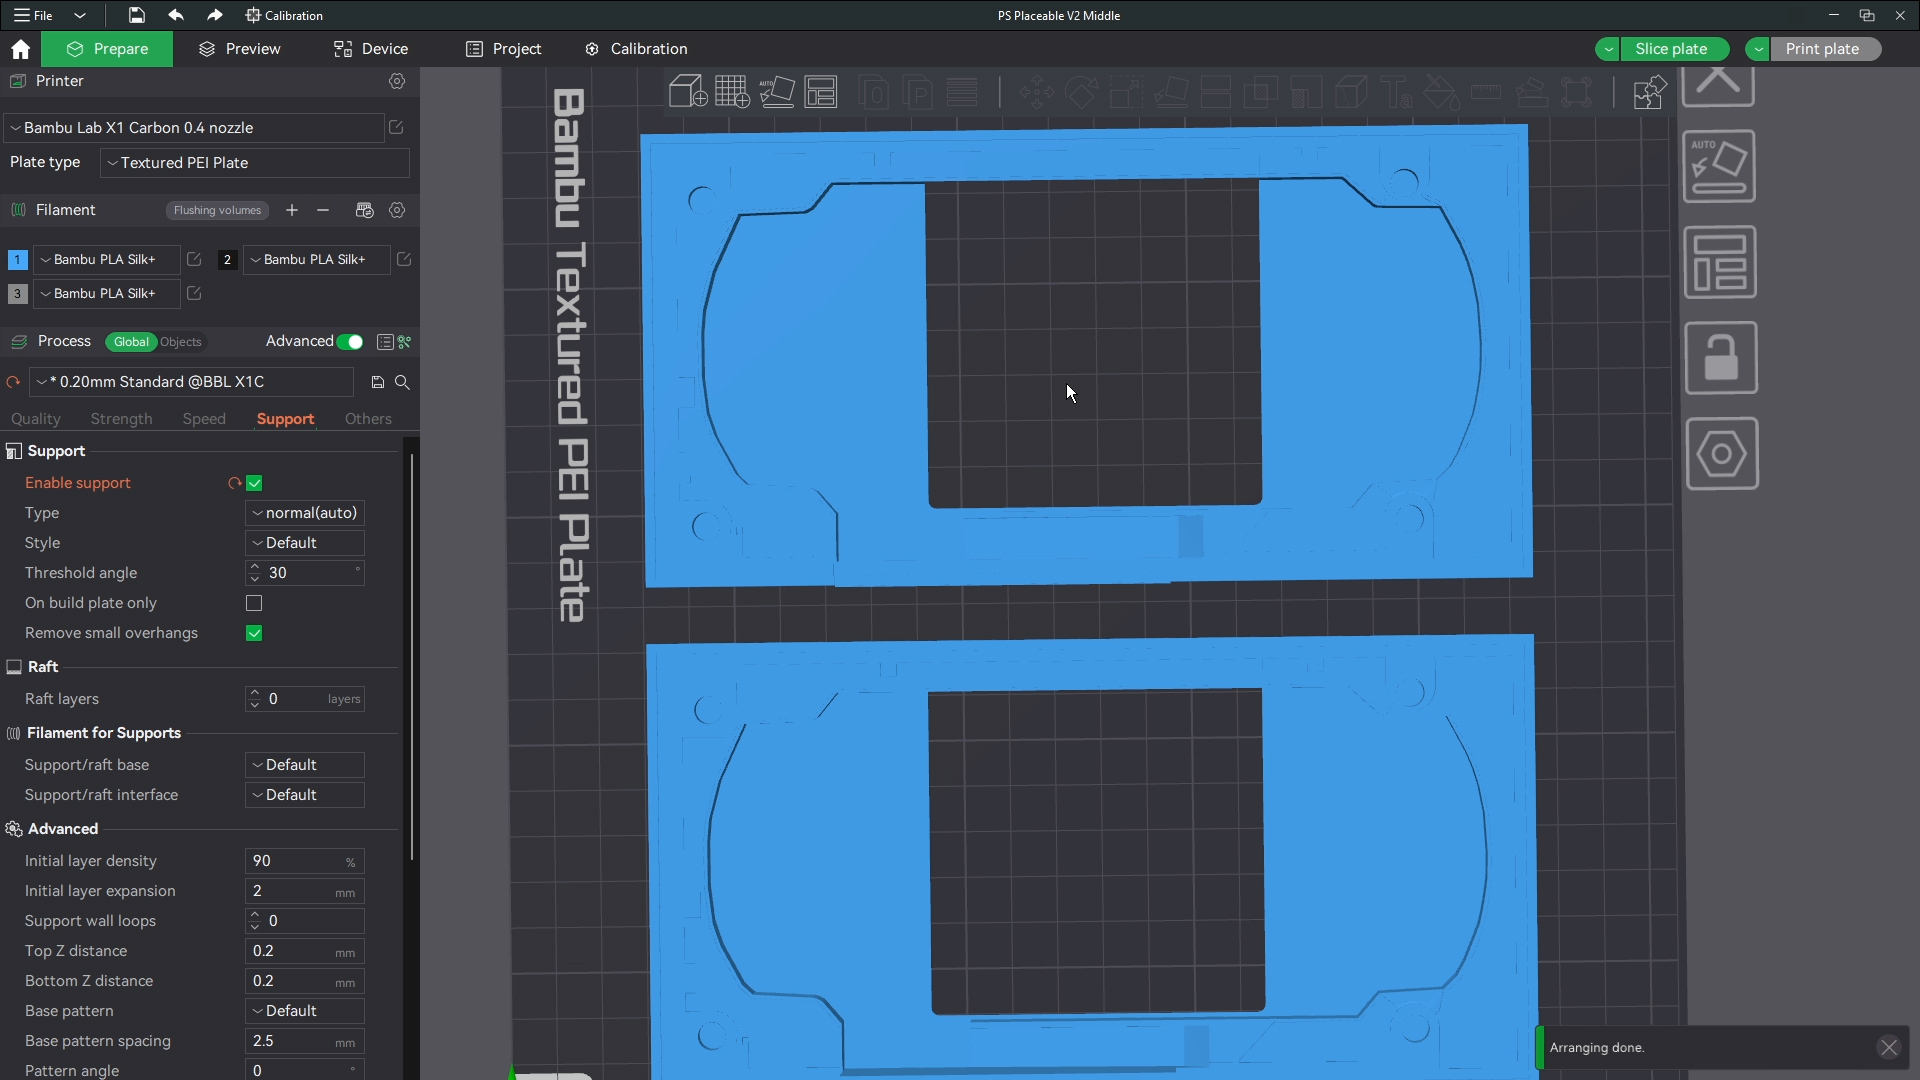
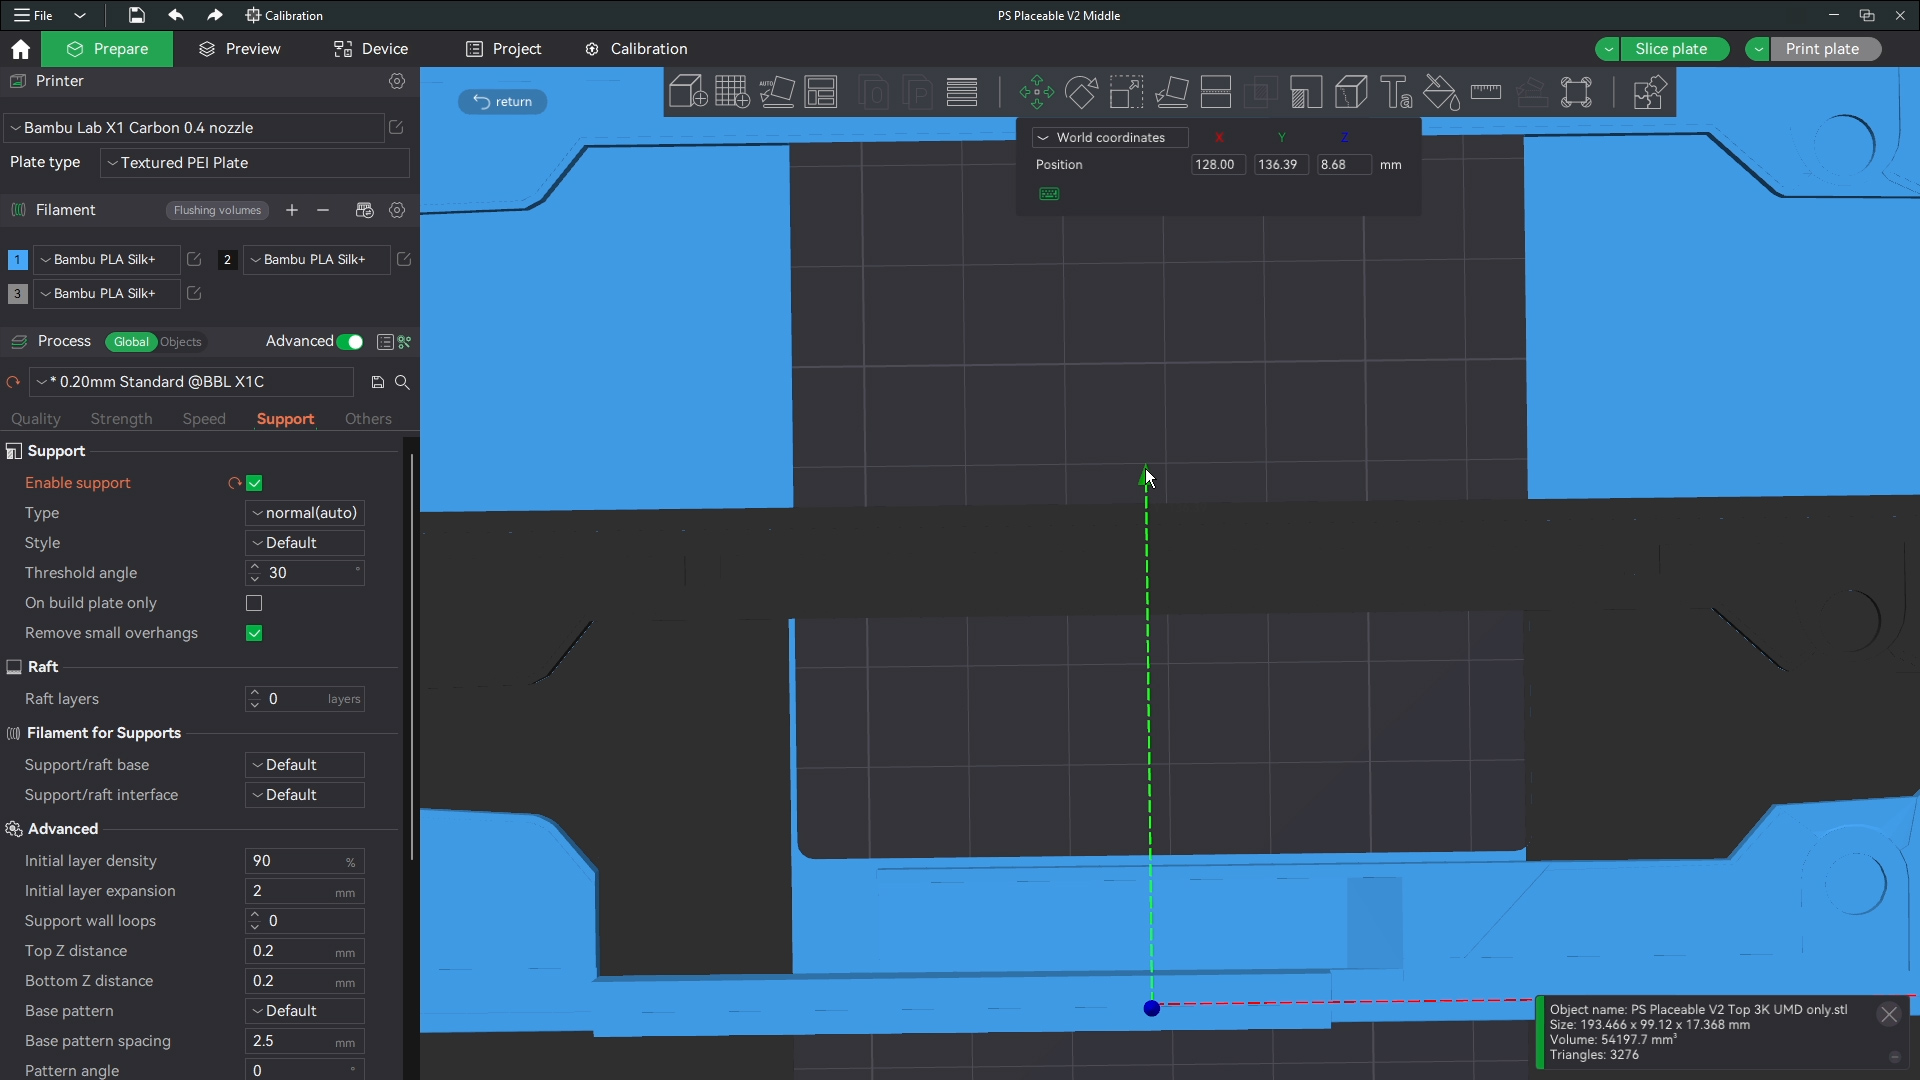
The difference between 2K and 3K closed top
There is only a 0.6 mm difference between these two. However if you print the wrong one the UMD drive will be slightly off and it wont look right so make sure you use the right file. you can see in the middle where the black and blue do not overlap on the insdie
Print the extra smaller items; SD, buttons, and bracket
The SD card holder and the buttons will always be needed, I have finally sourced enough screws that can hold the PCB without a bracket so most people will not need to print the bracket in the future. One thing to note though if to remove supports from the inside of the SD card holder. Check the next picture for details.
(for 2000 models only) Print ribbon cable bracket
This part replaces the thumb stick in the 2000 model shells. This is explained in detail during the build guide. I print these in TPU as a bit of flex is needed for this part. print this with supports as well.
(If your folders do not have V2 2000 ribbon bracket please send me a message a few orders went out without this file somehow)
Last printing step remove supports from the center of the memory card holder
The spot where the memory card will be place needs to be bridged normally with no supports this lets the part form right and tight enough to hold the memory card. I use the edge painter here again to keep the middle from generating supports. Thats it you should have all the parts you need now for your build. Head over to the PSP disassembly guide for the next steps in the build process.